TL;DR:
- Proper surface preparation, including cleaning, repairing, sanding, and priming, is crucial for a long-lasting paint finish. Skipping these steps leads to paint failure, and professionals dedicate the majority of their time to preparation tasks. Using the right tools, selecting appropriate primers, and avoiding common mistakes ensure adhesion and durability.
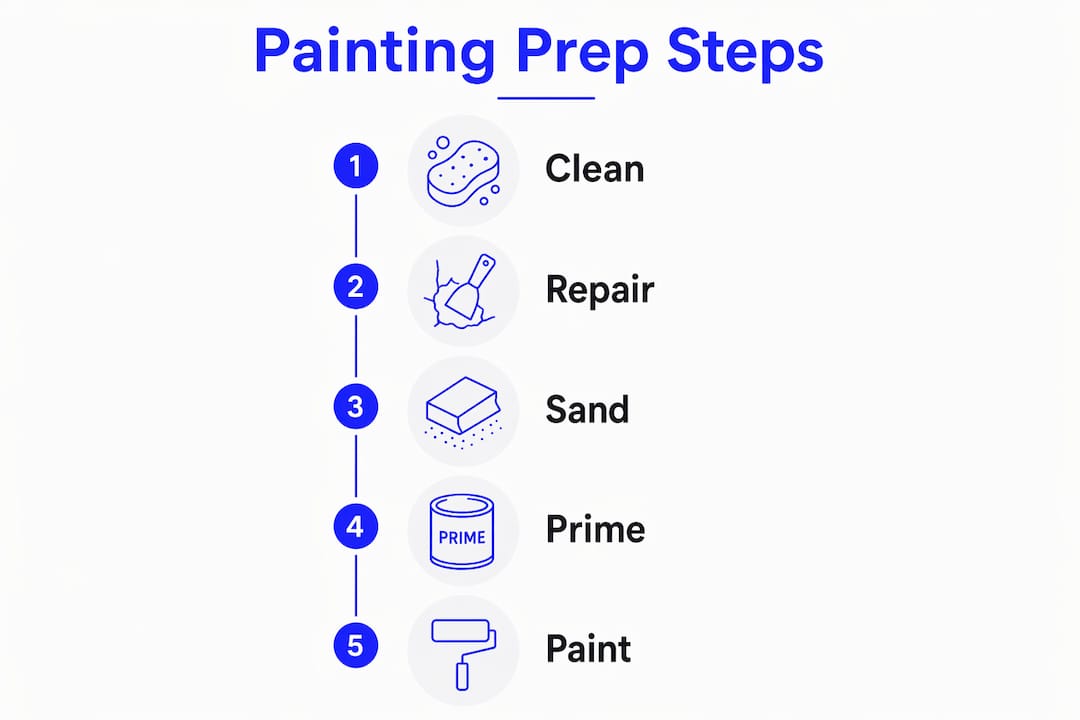
Prepping surfaces for painting is defined as the process of cleaning, repairing, sanding, and priming any surface to guarantee paint bonds correctly and the finish holds for years. Skip these steps and the paint will fail. Professional painters spend 50–70% of total project time on preparation alone, not application. That figure reflects a hard truth: the quality of your finish is decided before a single drop of paint touches the wall. This guide covers every stage of surface preparation for painting, from the tools you need to the mistakes that cost homeowners money.
What tools and materials do you need for prepping surfaces?
The right materials make preparation faster and more reliable. Gathering everything before you start prevents mid-job delays and keeps the process moving cleanly.
Essential tools and materials:
- Sanding blocks and sandpaper: Use 120–150 grit for walls and plaster, and 150–180 grit for glossy or previously painted surfaces
- Putty knife and scraper: For removing loose or flaking paint and applying fillers
- Sugar soap or a degreaser: For cleaning walls, ceilings, and trim before any other step
- Spackling compound: For small holes and minor surface damage
- Joint compound: For larger cracks, damaged plaster, or patched sections of drywall
- Primer: Oil-based, shellac, or water-based depending on the substrate
- Protective gear: Gloves, a P2 dust mask for sanding, and safety glasses
Primer selection deserves particular attention. Water-based primers suit most interior walls and previously painted surfaces. Oil-based primers work best on bare timber, stained surfaces, and high-moisture areas. Shellac-based primers, such as Zinsser BIN, block severe stains and odours that water-based products cannot seal.
Pro Tip: Buy a small vacuum or keep a damp microfibre cloth nearby during sanding. Dust left on the surface will show through your primer coat and create a rough, uneven finish.
| Primer Type | Best Use |
|---|---|
| Water-based | Previously painted walls, plaster, low-moisture areas |
| Oil-based | Bare timber, high-moisture zones, exterior substrates |
| Shellac-based | Severe stains, smoke damage, odour blocking |
How do you clean and repair surfaces to ensure paint adhesion?
90% of paint failures trace back to residual dirt or grease blocking chemical adhesion. That statistic means cleaning is not a preliminary courtesy. It is the single most critical step in the entire preparation process.
Follow these steps to clean and repair surfaces correctly:
- Wash the surface with sugar soap. Mix sugar soap with warm water and scrub walls, ceilings, and trim thoroughly. Pay close attention to kitchens, bathrooms, and areas near doorways where grease and grime accumulate.
- Check for mould. Treat any mould with a diluted bleach solution or a dedicated mould remover before washing. Painting over mould without treating it causes the problem to return within months.
- Allow the surface to dry completely. Painting over wet or damp substrates leads to premature paint degradation. For exterior work, temperatures need to be above 8–10°C and the surface must be fully dry before you begin.
- Remove loose or flaking paint. Use a scraper or putty knife to lift any paint that is peeling, bubbling, or lifting. Feather the edges of scraped areas with sandpaper so there are no ridges. Neglecting this step creates visible blemishes even under premium paint.
- Fill holes and cracks. Apply spackling compound to small holes and joint compound to larger repairs. Press the filler firmly into the cavity, overfill slightly, and allow it to cure fully before sanding back flush.
- Sand repaired areas smooth. Once filler is dry, sand the patched sections with 120 grit until they sit level with the surrounding surface.
- Test for lead paint in older homes. Older properties require lead-based paint testing before any sanding begins. Lead dust from sanding old paint carries serious health risks. Use a lead test kit, available from hardware stores, before proceeding.
Pro Tip: Run your hand across the cleaned surface before priming. If it feels chalky or powdery, the old paint has broken down and needs a full wash and sand before any new product goes on.
What role does sanding play in surface preparation for painting?
Sanding is not about removing paint. Experienced painters describe it as creating a dull surface that primer can bond to more effectively. That distinction matters because over-sanding strips too much material, while under-sanding leaves a surface too smooth for primer to grip.
What sanding achieves:
- Removes loose, flaking, or chalky paint that would cause new coats to peel
- Smooths patched and repaired areas so they blend with the surrounding surface
- Dulls glossy finishes to create mechanical tooth for primer adhesion
- Opens the surface profile on bare timber and metal for better product penetration
Sanding creates mechanical tooth so primer molecules physically link to the surface. This is especially critical on smooth or previously gloss-painted surfaces where adhesion would otherwise be minimal.
For walls and plaster, 120–150 grit sandpaper is the standard choice. For glossy or previously painted surfaces, move to 150–180 grit to dull the sheen without cutting through the existing coat. On bare timber, start with 80–100 grit to remove roughness, then finish with 120 grit before priming.
Power sanders, such as a random orbital sander, speed up the process on large flat areas. Hand sanding remains the better option for detailed work, corners, and timber profiles where a power tool removes too much material too quickly.
After sanding, remove all dust before priming. Wipe surfaces with a damp cloth or use a vacuum with a brush attachment. Dust left behind creates a barrier between the primer and the substrate, which defeats the purpose of sanding entirely.
Pro Tip: Sand in the direction of the grain on timber surfaces. Cross-grain sanding leaves scratches that show through paint, particularly on doors and window frames where light hits at an angle.
When and how should you select and apply primer?
Primer is not optional on bare or repaired surfaces. Using the wrong primer type, such as a non-oil-based product on porous bare timber, typically results in a repaint within one year. Primer selection is about substrate compatibility, not brand preference.
When primer is non-negotiable:
- Bare timber, MDF, or new plasterboard
- Any surface with visible repairs or patches
- Surfaces with staining from water, smoke, or tannins
- Drastic colour changes, particularly from dark to light
- Previously unpainted masonry or render
High-solids primers with 40–60% solids content are preferred for filling surface pores and building a durable foundation. Higher solids content means more material stays on the surface after the carrier evaporates, which translates directly to better adhesion and a more uniform topcoat.
For interior walls with minor repairs, a quality water-based primer such as Dulux Prepcoat or Taubmans All Prep is sufficient. For bare or previously stained timber, an oil-based primer like Dulux Weathershield Primer or a shellac product gives far better penetration and stain blocking. Understanding the real role of primer in your paint system prevents the most common and costly preparation failures.
Apply primer in a thin, even coat. Allow it to cure fully according to the manufacturer’s instructions, which is typically two to four hours for water-based products and overnight for oil-based. Sand lightly with 180–220 grit after the primer dries to remove any raised grain or dust nibs before applying your topcoat.
Pro Tip: Tint your primer to a mid-tone between your current surface colour and your chosen topcoat. This reduces the number of topcoats needed, particularly when making a significant colour change.
What are the most common mistakes when prepping surfaces?
Most paint failures are preventable. The errors below account for the majority of jobs that peel, bubble, or look uneven within the first year.
- Skipping the clean. Painting over grease, dust, or residue is the leading cause of adhesion failure. No primer or topcoat bonds reliably to a contaminated surface. Always wash with sugar soap before anything else.
- Ignoring glossy surfaces. Paint applied directly to a gloss finish will peel. Sanding to dull the sheen is not optional on any previously gloss-painted surface.
- Using the wrong filler. Spackling compound shrinks and cracks when used in deep or wide repairs. Use joint compound for anything larger than a small nail hole, and allow it to cure fully before sanding.
- Painting in poor conditions. Humidity above 85% and temperatures below 10°C both compromise adhesion and drying. Check how humidity affects paint before scheduling exterior work, particularly in Melbourne’s variable autumn and winter conditions.
- Underestimating the time required. Homeowners consistently allocate too little time for preparation. A room that takes two hours to paint may require four to six hours of proper preparation to achieve a finish that lasts.
- Neglecting hardware and fixtures. Label and bundle fixtures and screws by location in a dedicated container before removing them. Disorganised hardware causes delays and damage during reassembly.
Key takeaways
Thorough surface preparation, covering cleaning, repairing, sanding, and priming, is the single most reliable predictor of how long a paint finish will last.
| Point | Details |
|---|---|
| Prep time is the majority of the job | Professionals spend 50–70% of project time on preparation, not painting. |
| Cleaning prevents most failures | 90% of paint failures stem from residual dirt or grease blocking adhesion. |
| Sanding creates mechanical grip | Dulling glossy surfaces with 150–180 grit sandpaper is required for primer to bond. |
| Primer selection is substrate-specific | Wrong primer on porous timber typically leads to a repaint within one year. |
| Conditions matter for exterior work | Surfaces must be dry and above 10°C before any exterior coating is applied. |
The part most homeowners get wrong
By Jarrad
After years of working on everything from freshly built homes in Doncaster to century-old Edwardian facades in Hawthorn, the pattern is consistent. Homeowners who are unhappy with their paint job almost never had a problem with the paint itself. The problem was what happened before the paint went on.
The most common misconception I see is treating preparation as a quick preliminary step rather than the core of the job. People spend hours choosing the right colour and the right sheen, then rush through cleaning and sanding to get to the part that feels productive. That approach produces a finish that looks reasonable for six months and then starts to tell the truth.
On heritage properties in particular, the substrate is rarely in the condition it appears. Timber that looks solid may have surface oxidation or old oil-based coatings that a water-based primer simply will not adhere to. Render that looks stable may have hairline cracks that open with the first cold snap. Skipping a thorough inspection before prep begins is where expensive mistakes are made.
My honest advice: double the preparation time you think you need. If you are painting a room, plan a full day for prep and a separate day for painting. If you are tackling an exterior, factor in washing, drying time, repairs, and priming as distinct stages. The finish you get at the end will reflect exactly how much care went into the surface before the topcoat was applied.
— Jarrad
How solshine handles surface preparation on every project
Solshine brings the same preparation discipline to every project, whether it is a single interior room in Richmond or a full exterior restoration on a Victorian terrace in Kew.

Every Solshine project begins with a thorough assessment of the substrate. The team cleans, repairs, sands, and primes before a topcoat is considered. For interior painting projects, that means properly filled and feathered repairs, correct primer selection for each surface type, and a finish that holds. For exterior painting work, it means pressure washing, full moisture checks, and coating only when conditions are right. If your home needs more than paint, Solshine handles render repair, timber restoration, and heritage joinery under the same roof. Contact Solshine to discuss your project.
FAQ
How long does surface preparation take before painting?
Professional painters allocate 50–70% of total project time to preparation. For a standard interior room, expect four to six hours of prep for every two hours of painting.
What happens if you skip cleaning surfaces before painting?
90% of paint failures are caused by residual dirt or grease preventing adhesion. Paint applied to an uncleaned surface will peel or bubble within months.
Do you always need primer when prepping walls for paint?
Primer is required on bare surfaces, repaired areas, stained substrates, and any surface undergoing a significant colour change. Skipping primer on bare timber or plasterboard leads to uneven absorption and poor topcoat adhesion.
What grit sandpaper should you use when prepping furniture for painting?
Start with 80–100 grit to remove roughness or old finish, then move to 120 grit before priming. For glossy furniture surfaces, 150–180 grit is sufficient to dull the sheen and create mechanical tooth without removing the underlying coat.
Can you paint over old paint without sanding?
Painting over a sound, flat, previously painted surface is possible with a bonding primer. However, any glossy, loose, or flaking paint must be sanded or stripped first. Skipping this step on a gloss surface will result in peeling.


