
TL;DR:
- Exterior trim repairs focus on restoring damaged sections of a home’s decorative timber trims, especially in heritage homes across Melbourne. Proper assessment, careful material choice, and thorough surface preparation are essential to avoid costly failures and preserve original architectural details. Early intervention and combining traditional methods with modern materials help maintain the character and durability of period homes.
Exterior trim repairs are defined as targeted restorations or replacements of damaged sections of a home’s decorative and protective timber trims, including fascias, window casings, door architraves, and bargeboards. For Victorian and Edwardian homes across Melbourne’s inner east and bayside suburbs, these repairs carry extra weight. The original mouldings, profiles, and joinery details are irreplaceable once lost. Repairing localized areas rather than replacing entire trim sections saves money and preserves the heritage details that define your home’s character. The standard decision-making framework covers minor cracks, small-section rot, loose boards, and peeling paint as repair territory, reserving full replacement for widespread structural failure.
Examples of exterior trim damage and repair techniques
The most common examples of exterior trim repairs on period homes fall into three categories: surface damage, localised rot, and partial board failure. Each requires a different technique and a different level of intervention.
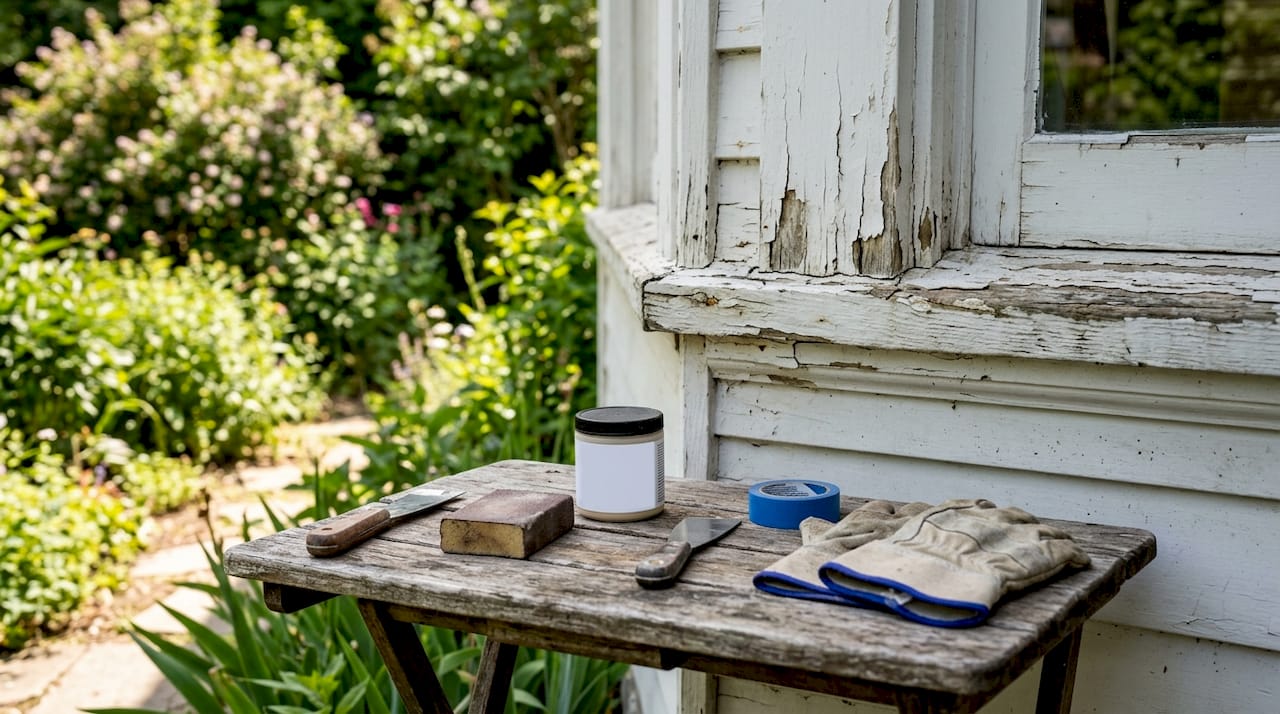
Surface damage: cracks, nail holes, and peeling paint
Small cracks and nail holes are the most frequent surface issues on Victorian and Edwardian trims. Water-based acrylic fillers work well for hairline cracks and minor surface voids on painted timber. Solvent-based fillers offer better adhesion on oily or resinous timbers. After filling, sand flush, prime, and repaint to restore the protective coating.
Peeling paint is a symptom, not a cause. Before repainting, scrape back all loose material, sand to a sound surface, and identify whether moisture is entering from behind the trim. Skipping this step produces a repair that fails within one season.
Localised rot: wood hardener and epoxy filler
Localised rot is the defining challenge for heritage timber trims. The repair process begins with cutting or chiselling out all soft, decayed wood until you reach sound timber. Apply a penetrating wood hardener to stabilise the remaining fibres. Drilling small holes to apply wood hardener deep into rot-damaged timber improves repair longevity over surface application alone. Once the hardener cures, fill the void with a two-part epoxy filler.
Partial board replacement
When rot or damage extends across more than a third of a board’s length, partial replacement becomes the right call. Effective scarf joints in partial board replacement allow seamless integration of new trim with preserved original sections. A scarf joint cut at 45 degrees, glued, and nailed provides a weathertight bond that is nearly invisible once painted.
- Assess damage extent before selecting a repair method
- Cut back to sound timber before applying any filler or hardener
- Use scarf joints for partial replacements to maintain profile continuity
- Sand all repaired surfaces flush before priming
Pro Tip: Always work in dry conditions with temperatures consistently above 10°C. Exterior trim repairs performed in cold or damp conditions compromise curing times for both wood hardeners and epoxy fillers.
Step-by-step repairs for Victorian window and door trims
Victorian window sills and door casings share a common vulnerability: the bottom corners. Water pools there, paint breaks down, and rot takes hold before most homeowners notice. The following walkthrough covers the standard repair sequence Sol Shine applies to these high-risk zones.
- Inspect and probe. Use a screwdriver or awl to probe the bottom corners of window sills and door casings. Soft, spongy timber indicates active rot. Map the full extent before cutting.
- Remove decayed timber. Cut back to sound wood using a sharp chisel or oscillating multi-tool. Do not leave any soft material behind. Rot left in place will continue spreading under the repair.
- Apply wood hardener. Brush or inject penetrating wood hardener into the exposed timber. Allow several hours minimum for full penetration and cure. Do not rush this step.
- Fill with two-part epoxy. Mix the epoxy filler in small batches. Epoxy fillers set within 10–15 minutes, so working in small batches prevents waste and ensures full coverage before the mixture stiffens. Build up the profile in layers if the void is deep.
- Shape and sand. Once cured (allow 24–48 hours), shape the epoxy to match the original profile using a rasp, file, and sandpaper. Victorian moulding profiles are specific. Take time to match the original geometry before sanding smooth.
- Recaulk all joints. Apply a paintable acrylic caulk to all joints between the repaired trim and adjacent surfaces. This step is critical for weatherproofing and is frequently skipped on DIY repairs.
- Prime and repaint. Apply a quality exterior primer to all repaired and sanded surfaces. Follow with two topcoats of exterior paint. For heritage homes, Sol Shine recommends products like Dulux Weathershield for their proven durability on Melbourne’s variable climate.
Pro Tip: To maintain original moulding profiles during repair, take a profile gauge reading of an undamaged section of the same trim before you start. Use it as a template when shaping the epoxy filler.
Understanding heritage timber trim requirements before you begin saves costly rework and protects the original character of your home.
Materials for exterior trim repair and partial replacement
Choosing the right material is as important as the repair technique itself. The wrong filler or the wrong replacement timber will fail prematurely, regardless of how carefully the work is done.
| Material | Best use | Key advantage |
|---|---|---|
| Two-part epoxy filler | Rot repair, void filling, profile rebuilding | Harder and more durable than original wood |
| Penetrating wood hardener | Stabilising soft or punky timber before filling | Consolidates fibres and improves filler adhesion |
| Water-based acrylic filler | Minor cracks and nail holes on painted surfaces | Easy to sand, low shrinkage, paintable |
| Preservative-treated timber | Partial or full board replacement | Resists moisture and insect attack |
| Pre-primed replacement trim | Like-for-like profile replacement | Reduces on-site preparation time |
Two-part epoxy is the gold standard for exterior wood repairs due to its adhesive strength and water resistance. It often dries harder and becomes more durable than the original timber. This makes it the preferred choice for rebuilding profiles on Victorian architraves and window sills where structural integrity matters.
For partial or full board replacements, preservative-treated timber is the correct choice. Priming all four sides of new wood trim before installation prevents moisture absorption from the back and sides. This step is non-negotiable on period homes where trim boards sit close to masonry or render, trapping moisture against unprimed surfaces.
When PVC trim is present (less common on heritage homes but occasionally found on later additions), use acrylic fillers formulated for PVC. Epoxy fillers do not bond reliably to PVC substrates. For guidance on fascia board replacement specifically, the diagnostic and material selection process follows the same principles as general trim repair.
Common pitfalls in exterior trim repairs
The most expensive trim repairs are the ones done twice. These are the mistakes that cause premature failure.
- Rushing cure times. Wood hardener needs several hours minimum; epoxy filler requires 24–48 hours to fully cure before sanding or painting. Applying primer before the epoxy cures causes adhesion failure and peeling within months.
- Ignoring the moisture source. Exterior trim repair must start with identifying the source of moisture, such as clogged gutters or poor flashing, rather than just applying filler. Repairs fail prematurely when the root cause remains. Check gutters, downpipes, and flashings before touching the trim. Sol Shine’s approach to moisture control addresses this diagnostic step as part of every heritage restoration.
- Insufficient surface preparation. Sanding, scraping, and priming are not optional steps. Adhesion failure on painted surfaces almost always traces back to inadequate preparation.
- Failing to prime all surfaces. New timber and repaired surfaces must be primed on all exposed faces before painting. Leaving any surface unprimed creates a pathway for moisture ingress.
- Over-repairing when targeted repair suffices. Full board replacement is sometimes chosen for convenience when a targeted epoxy repair would restore structural integrity at a fraction of the cost. Targeted professional repair can restore structural integrity and save significant costs while preserving original architectural heritage.
Pro Tip: Before any repair, address weatherproofing vulnerabilities around the affected trim. A repaired sill under a leaking gutter will rot again within two years.
Key takeaways
Effective exterior trim repairs on period homes depend on accurate damage assessment, correct material selection, and thorough surface preparation before any coating is applied.
| Point | Details |
|---|---|
| Repair before replacing | Targeted epoxy repairs restore structural integrity and preserve original heritage profiles at lower cost. |
| Diagnose moisture first | Identify and fix moisture sources like gutters and flashing before applying any filler or coating. |
| Respect cure times | Allow 24–48 hours for epoxy filler to fully cure before sanding or priming to avoid adhesion failure. |
| Prime all surfaces | Prime all four sides of new timber and all repaired surfaces to prevent moisture ingress and extend durability. |
| Match original profiles | Use a profile gauge on undamaged sections to replicate Victorian and Edwardian moulding geometry accurately. |
Why I think most homeowners repair too late
The pattern I see repeatedly on Victorian and Edwardian homes across Melbourne is the same. A homeowner notices peeling paint on a window sill. They repaint over it. The following year, the paint peels again, this time with a soft patch underneath. By the time they call for a proper assessment, the rot has spread into the adjacent casing and the repair cost has tripled.
Early intervention is the single most valuable thing you can do for heritage timber trim. A small crack or a patch of peeling paint costs very little to fix correctly. The same spot left for two Melbourne winters becomes a structural repair requiring epoxy rebuilding, partial board replacement, and full repainting. The difference in cost is significant. The difference in preserving original craftsmanship is even greater.
The other thing I feel strongly about is the balance between modern materials and traditional methods. Two-part epoxy is not a compromise. It is genuinely superior to original timber in terms of water resistance and hardness. Using it to rebuild a Victorian window sill profile is not a betrayal of heritage. It is the most respectful thing you can do, because it means the original moulding stays in place rather than being ripped out and replaced with a generic profile from a hardware store.
The homes I find most rewarding to work on are the ones where the owners have taken care of the small things consistently. Regular inspection of timber exteriors, prompt attention to paint failure, and a willingness to invest in proper materials and preparation. Those homes hold their character for generations.
— Jarrad
Heritage trim repairs done right in Melbourne
Sol Shine specialises in exterior painting and heritage restoration for Victorian and Edwardian homes across Melbourne’s inner east and bayside suburbs, including Kew, Hawthorn, Camberwell, Brighton, and Malvern. Every project begins with a thorough assessment of trim condition, moisture sources, and surface preparation requirements before a brush touches the timber.
Sol Shine’s exterior painting and trim repair work covers the full scope: wood hardener application, epoxy filler repairs, partial board replacement, priming, and premium finish coats. For homeowners managing larger heritage restoration projects, Sol Shine handles everything under one roof. View completed heritage painting projects to see the standard of finish and the level of care applied to period homes across Melbourne.
FAQ
What are the most common examples of exterior trim repairs?
The most common exterior trim repairs include filling small cracks and nail holes with acrylic filler, treating localised rot with wood hardener and two-part epoxy, and replacing partially damaged boards using scarf joints. Peeling paint repairs requiring full surface preparation and repainting are also frequent on Victorian and Edwardian homes.
When should you repair rather than replace exterior trim?
Repair is recommended for localised rot, minor cracks, loose boards, and peeling paint. Full replacement is necessary only when rot is widespread, the board is severely warped, or structural integrity is lost across the full length.
How long does epoxy filler take to cure on exterior trim?
Epoxy filler requires 24–48 hours to fully cure depending on temperature and humidity before sanding or painting. Applying primer before full cure causes adhesion failure and premature paint peeling.
What causes exterior trim repairs to fail prematurely?
The most common cause of premature failure is not addressing the moisture source before repairing. Clogged gutters, poor flashing, and unprimed back surfaces allow water to re-enter the repair zone and restart decay.
Can I repair Victorian moulding profiles with epoxy filler?
Yes. Two-part epoxy filler can be shaped to replicate original Victorian and Edwardian moulding profiles once cured. Use a profile gauge on an undamaged section of the same trim as a template, then shape the cured epoxy with a rasp and sandpaper before priming and painting.


