
TL;DR:
- Peeling paint on heritage homes signals moisture intrusion that can lead to costly structural damage if neglected. Proper preparation, premium materials, and adherence to weather conditions are essential for durable, long-lasting weatherproofing. Skipping these steps or choosing cheaper products often results in shorter paint life and higher long-term costs.
Peeling paint on a Victorian weatherboard is never just a cosmetic issue. Left untreated, moisture finds its way beneath the surface, timber softens, and what started as a flaking façade becomes a costly structural repair. For homeowners in Melbourne’s inner east and bayside suburbs, where Edwardian and Victorian homes define entire streetscapes, getting weatherproof painting right the first time is not optional. This guide covers the proven tools, preparation steps, paint selection principles, and application techniques that protect period homes against Melbourne’s famously unpredictable climate, season after season.
Table of Contents
- Key tools and materials for weatherproof painting
- Surface preparation: The foundation of weatherproofing
- Paint selection and application: What actually protects heritage homes?
- Step-by-step weatherproof painting process
- Troubleshooting common mistakes and ensuring longevity
- Perspective: Why shortcuts rarely work for heritage weatherproofing
- Protect your Melbourne heritage home with expert painting
- Frequently asked questions
Key Takeaways
| Point | Details |
|---|---|
| Premium paints last longer | Choosing top-tier paint can add a decade or more to your repaint cycle, saving you money and protecting your home. |
| Surface prep is critical | Thoroughly cleaning, repairing, and priming is vital for paint adhesion and weather resistance. |
| Use breathable paint for masonry | Heritage masonry must be allowed to breathe, so always use mineral or breathable anti-damp paints. |
| Check weather conditions | Apply paint only in the right temperature and humidity to ensure proper curing and avoid future failure. |
| Plan regular maintenance | Annual inspections and touch-ups can prevent minor paint issues from becoming major restoration projects. |
Key tools and materials for weatherproof painting
Before starting any work, you need to gather the right tools and products to ensure lasting results on period homes. The materials you choose at this stage directly determine how long your paintwork survives Melbourne’s wet winters and scorching summers.
Essential tools for weatherproof painting on heritage homes include:
- Pressure washer (with low-pressure settings for decorative features)
- Sanding blocks and orbital sanders for flat surfaces
- Stiff-bristle brushes for ornate trims and detailed mouldings
- Putty knives and flexible paint scrapers
- Quality natural-bristle and synthetic brushes suited to the paint type
- Drop sheets and masking tape appropriate for exterior use
Materials and product types vary depending on the substrate you are working with. For weatherboards, modern flexible acrylics are the dominant choice. For masonry walls, including brick and render, breathable mineral or lime-based paints are strongly preferred by heritage specialists.
| Surface type | Recommended product type | Key property |
|---|---|---|
| Timber weatherboards | Flexible exterior acrylic | UV resistance, movement tolerance |
| Painted render or masonry | Breathable mineral paint | Allows moisture vapour to escape |
| Ornate timber trims | Oil-based or water-based enamel | Hardness, fine finish |
| Bare timber repairs | Solvent-based primer | Deep penetration, sealing |
| Brick or exposed masonry | Lime wash or breathable mineral coat | Vapour permeable |
Key weatherproofing techniques for Melbourne heritage homes begin well before a brush touches the wall. Pressure washing, sanding, repairing damage, and applying primer are all non-negotiable steps to ensure adhesion and prevent moisture ingress. Skipping any one of them is where paint failures begin.
Choosing premium paint materials from established heritage suppliers matters more than most homeowners realise. Budget products may look identical on the tin, but they typically lack the binders and UV inhibitors that keep paint flexible and bonded through Melbourne’s temperature swings.
Pro Tip: Invest in premium-grade paints and primers from the outset. Quality products applied correctly to well-prepared surfaces regularly achieve 15 or more years of durable protection, whereas cheap alternatives often fail within three to five years, creating far greater expense in stripping, prep, and repainting.
Surface preparation: The foundation of weatherproofing
With materials in hand, you need methodical preparation to avoid expensive failures down the track. Many heritage homeowners underestimate how much time proper preparation requires. On Victorian and Edwardian homes, with their ornate bargeboards, decorative brackets, and layered cornices, preparation is genuinely painstaking work.
Here is the correct sequence for preparing a heritage exterior:
- Clean thoroughly with a pressure washer. Use low-pressure settings around decorative timber features to avoid raising the grain or forcing water into joints. High pressure is appropriate on masonry or solid render surfaces.
- Sand and repair all timber surfaces. Remove flaking paint back to a firm edge. Any softness or spongy feel in the timber indicates rot that must be cut out and replaced before painting begins.
- Fill cracks and movement-prone areas with flexible fillers. Rigid fillers crack again with timber movement. Use a premium flexible filler rated for exterior conditions and sized for the gap depth.
- Prime all bare timber and repair areas. Thorough surface preparation including primer application is what guarantees adhesion and blocks moisture from penetrating freshly repaired surfaces.
- Allow full drying time before the next coat. Rushing this stage is one of the most common causes of adhesion failure, especially in cooler, more humid Melbourne conditions.
“Assess structural movement, stabilise the substrate, and remediate issues such as concrete cancer before any painting begins.” Heritage façade solutions require this level of diligence precisely because paint applied over unstable substrates will always fail, regardless of product quality.
Understanding the painting process in the context of a heritage home means recognising that preparation may take as long as the application itself. On a large Victorian terrace with extensive timber detailing, two to three days of preparation before a single coat is applied is entirely normal.
Pro Tip: Before painting starts, document any visible structural movement in the façade, such as hairline cracks in render or gaps opening at timber joints. If those movements widen or change, it signals a substrate issue that needs resolving first. Painting over it will only mask the problem temporarily.
Choosing the right exterior coatings for your heritage home is inseparable from how well the surface underneath has been prepared. The best product in the world will underperform on a poorly prepped substrate.
Paint selection and application: What actually protects heritage homes?
Once the surface is prepared, success depends on picking the right paint and applying it by the book. The difference between a job that lasts fifteen years and one that starts failing in three often comes down to this single decision.
For timber weatherboards, flexible acrylic exterior paints are the right choice. They expand and contract with the timber through Melbourne’s temperature swings, which can range from below 10°C in winter to over 40°C in summer. Modern acrylics offer flexibility and UV protection well suited to weatherboards, while heritage specialists consistently prioritise breathable mineral paints over sealants for masonry.
For masonry walls, the critical rule is breathability. Solid brick walls, as found in most Edwardian homes, need to release moisture vapour from within. Standard acrylics and modern sealants create a barrier that traps that moisture, which then forces the paint off the surface from behind. Breathable, mineral-based paints avoid this entirely.
| Paint type | Average cost per litre | Expected lifespan | Best suited to |
|---|---|---|---|
| Premium exterior acrylic (e.g. Dulux Weathershield) | $60–$90 | 12–15 years | Timber weatherboards |
| Breathable mineral paint | $70–$110 | 10–15 years | Masonry, render |
| Standard budget acrylic | $20–$35 | 3–5 years | Not recommended for heritage |
| Oil-based enamel | $50–$80 | 8–12 years | Timber trims, doors |
Premium paints like Dulux Weathershield provide 15 or more years of durability in Australian conditions, compared to just three to five years for budget acrylics. Over a typical heritage restoration budget, the difference in paint cost is far smaller than the difference in repainting frequency.
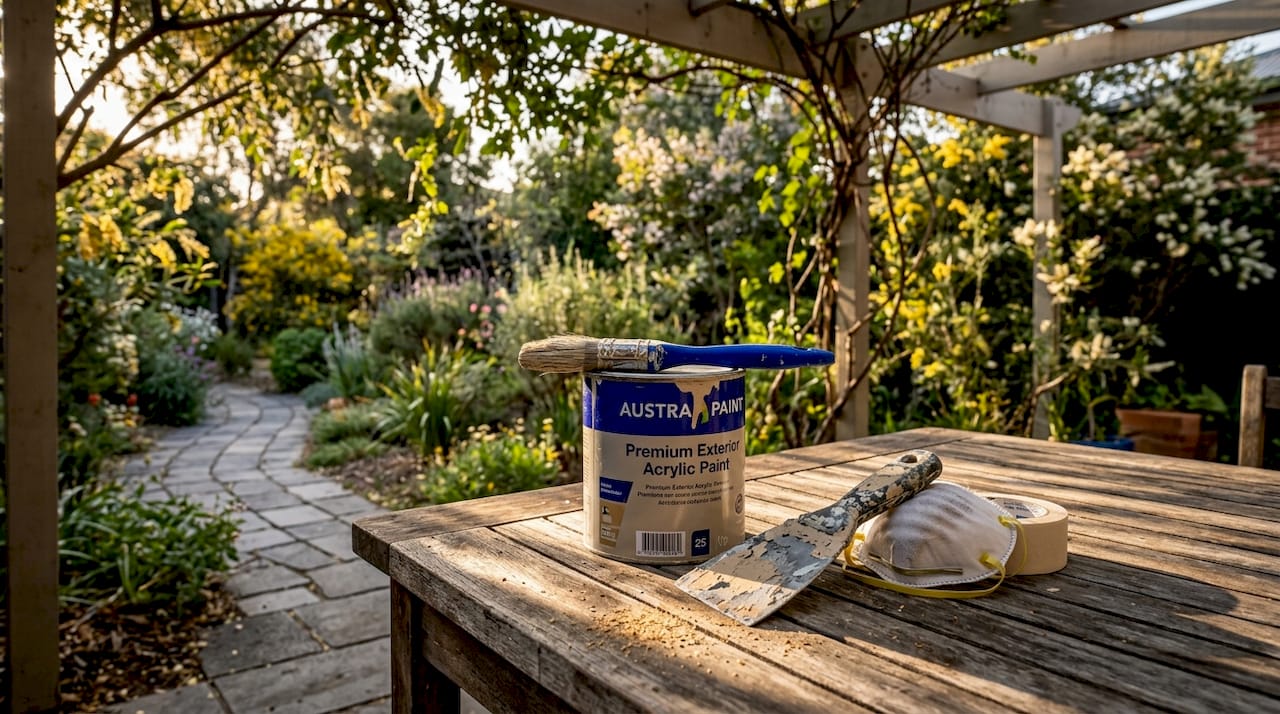
The comparison between premium vs standard paints on heritage homes is not simply about aesthetics. Premium products maintain colour stability, resist efflorescence on masonry, and hold their adhesion through thermal cycling in a way that budget paints cannot replicate.
Important application conditions to observe:
- Apply paint only when temperatures sit between 10°C and 25°C
- Humidity must remain below 85% during application and drying
- No rain should be forecast for at least 48 hours after the final coat
- Avoid painting in direct afternoon sun in summer, as surfaces become too hot
Heritage council overlays in suburbs such as Kew, Hawthorn, and Camberwell may also restrict the colour palette available to you. Always confirm approved colours and finishes with your local council before selecting a paint scheme, as non-compliance can require a full repaint at your own cost. Understanding paint longevity on period homes is essential when making these decisions.
Step-by-step weatherproof painting process
Now you are ready to apply your weatherproof painting skills with a clear, results-focused sequence. Following this order consistently is what separates a lasting finish from one that starts failing within a season.
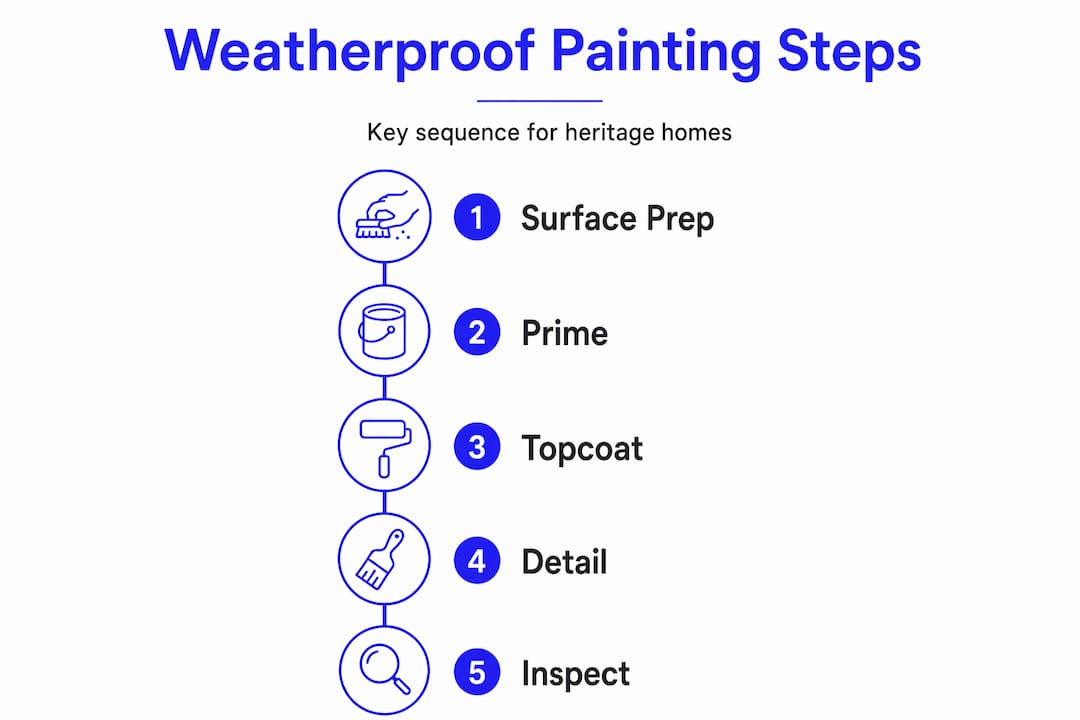
- Check the forecast. Confirm at least three to four days of suitable weather: temperatures between 10°C and 25°C, humidity under 85%, and no rain expected. Application conditions are critical; for heritage projects, also check local council permits and heritage overlay requirements.
- Complete all surface preparation. Work through cleaning, sanding, rot repairs, flexible filling, and priming as outlined above.
- Apply primer to all bare areas. Allow full cure time per the manufacturer’s instructions.
- Apply the first topcoat in thin, even passes. Thin coats dry more evenly and adhere better than thick coats. Two thin coats outperform one heavy coat every time.
- Inspect and touch up between coats. Look for holidays (missed spots), runs, or areas where the primer shows through.
- Apply the second and final topcoat. Maintain a wet edge as you work to avoid lap marks on large flat surfaces like weatherboard runs.
| Step | Key check | Heritage-specific note |
|---|---|---|
| Weather check | 10–25°C, humidity under 85% | Confirm no council permits outstanding |
| Surface prep | No soft timber, no loose paint | Document ornate features before sanding |
| Priming | Full coverage, cure time observed | Use solvent-based primer on raw timber repairs |
| First topcoat | Thin, even passes | Breathable paint only on damp masonry |
| Final topcoat | Full opacity, no lap marks | Match council-approved colour palette |
For edge cases involving damp masonry, breathable anti-damp paints are the only appropriate solution. Painting raw masonry with standard acrylics traps moisture and accelerates paint failure from beneath. Flexible fillers must also be used in any crack repairs before topcoating.
Pro Tip: Keep a written record of every paint product used, including brand, product name, colour code, and sheen level. This makes touch-up work seamless and provides exactly the documentation councils may request during heritage inspections. The painting guide and painting maintenance tips on the Sol Shine website provide further detail on this practice.
Troubleshooting common mistakes and ensuring longevity
Even with the best technique, issues can arise. Here is how to correct mistakes and keep your paintwork robust long after the scaffolding comes down.
Warning signs to watch for:
- Peeling or bubbling paint, particularly on south-facing walls or shaded façade sections
- Mould or lichen growth, often a sign of persistent moisture behind the surface
- Hairline cracks opening in render near window or door frames
- Discolouration or staining running from metal fixings
- Paint lifting at lap joints between weatherboards
Moisture is the most significant threat to heritage paintwork in Melbourne. Before any repainting, fix roof leaks, clear blocked gutters, and address any drainage issues at ground level. Painting over a moisture problem always produces a short-lived result.
Breathable anti-damp paints are the only safe option on damp masonry. Sealing damp render with impermeable paint traps moisture within the wall, accelerating paint failure and potentially causing structural deterioration.
Understanding the key paint durability factors on Melbourne heritage homes helps homeowners set realistic expectations and plan maintenance accordingly. An annual visual inspection is all that is typically needed. Walk the perimeter in good light, look closely at any chips or cracks, and retouch before moisture has a chance to enter.
Consistent small interventions, such as touching up a chipped sill or resealing a joint, prevent minor issues from becoming full-scale repaints. These preventative preservation tips extend the life of quality paintwork considerably.
Perspective: Why shortcuts rarely work for heritage weatherproofing
Sol Shine has worked on Victorian and Edwardian homes across Melbourne for many years. The most consistent pattern we observe is this: the homeowners who spend the most on repairs are almost always those who tried to save money on the previous job.
Cheap paint and skipped preparation are false economies. They look fine for a season or two. Then peeling starts, moisture enters, and suddenly a $5,000 repaint becomes a $20,000 repair involving weatherboard replacement, render remediation, and structural work. It happens more than most people would expect.
There is also a misconception that the newest products solve everything. Some of the modern plastic-based coatings marketed for heritage homes offer impressive short-term water resistance. But on solid masonry Victorian walls, where breathability is not optional but essential, these products can trap moisture within the wall cavity. The result is spalling render, rising damp, and paint failure from the inside out. Breathable paint technology is non-negotiable on these buildings. It is not a preference; it is a structural requirement.
The other shortcut we see frequently is skipping the primer. Some one-coat products promise full coverage and adhesion without primer on bare timber. In our experience, that promise holds reasonably well under controlled conditions. Melbourne’s exterior environment is not controlled. Sun, rain, and temperature variation begin testing those adhesion claims within months. A proper solvent-based primer on bare timber is an investment of one extra step that returns years of additional durability.
The most enduring work we do on heritage homes uses modern techniques for heritage homes that respect the physics of old buildings, not ones that force modern products onto surfaces they were not designed for. Heritage restoration is a discipline. It rewards patience, quality, and knowledge. Shortcuts rarely survive Melbourne’s first winter.
Protect your Melbourne heritage home with expert painting
You have read the process. If you want professionals who handle compliance, preparation, paint selection, and application with the care your home deserves, Sol Shine is built exactly for that.
Sol Shine specialises in heritage painting services for Victorian and Edwardian homes across Melbourne’s inner east and bayside suburbs, including Kew, Hawthorn, Camberwell, Brighton, Malvern, and Essendon. Every project is handled under one roof, from render repair and timber restoration through to premium weatherproof topcoats, with work backed by our commitment to lasting results. Browse our heritage project gallery to see completed restorations, and explore our restoration value guide to understand how quality heritage painting enhances long-term property value. Contact Sol Shine today for a consultation tailored to your home.
Frequently asked questions
What type of paint lasts longest on Melbourne’s heritage weatherboards?
Premium acrylic paints designed for Australian exterior conditions, such as Dulux Weathershield, consistently outperform standard options, particularly when applied over thoroughly prepared timber with an appropriate primer.
Can I paint over damp masonry on my old Melbourne home?
Only breathable anti-damp paints are appropriate over damp, solid masonry walls. Standard acrylics and sealants trap moisture and accelerate structural deterioration.
What weather conditions are best for exterior painting in Melbourne?
Ideal conditions are between 10°C and 25°C, with humidity below 85%, and no rain for 48 hours after the final coat is applied.
How often should I repaint a heritage home in Melbourne?
With quality weatherproof products applied correctly, repainting is typically needed every 12 to 15 years. Budget acrylics often require attention within three to five years, making premium products far more cost-effective over time.


