TL;DR:
- Understanding heritage-specific terms and application techniques is vital for successful Victorian or Edwardian home restoration.
- Compliance with Heritage Overlays requires knowledge of approved colours, materials, and council regulations.
- Clear communication and expert advice help prevent costly mistakes and ensure authentic, long-lasting results.
Restoring a Victorian or Edwardian home in Melbourne is one of the most rewarding projects a homeowner can undertake. But the moment your painter starts talking about craquelure, limewash, or Heritage Overlays, it’s easy to feel lost. Miscommunication between homeowner and tradesperson is one of the most common causes of costly mistakes on heritage projects. Understanding the terminology used by painters, restorers, and council planners gives you the confidence to ask the right questions, make informed decisions, and protect the investment you’re making in your home’s future.
Table of Contents
- Core painting terms every homeowner should know
- Essential application techniques and paint defects
- Heritage painting terms unique to Victorian and Edwardian homes
- Navigating heritage overlays and paint compliance
- What most guides miss about painting heritage homes
- Get expert help for your heritage painting project
- Frequently asked questions
Key Takeaways
| Point | Details |
|---|---|
| Know your layers | Primer, undercoat, and topcoat each play a unique role in a long-lasting paint job. |
| Understand key techniques | Techniques like cutting in and laying off are crucial for heritage detail and finish. |
| Respect heritage guidelines | Heritage Overlays and approved palettes protect your home’s authenticity and value. |
| Choose materials wisely | Breathable and low-VOC paints are best for older homes and indoor air quality. |
| Clear communication matters | Using correct painting terms helps avoid costly miscommunications with your tradespeople. |
Core painting terms every homeowner should know
Now that you know why understanding these terms matters, let’s clarify their meanings. The foundation of any painting project rests on three products applied in sequence: primer, undercoat, and topcoat.
A primer is the first coat applied directly to a bare or prepared surface. Its job is to seal the surface and create a bond for everything that follows. An undercoat builds on the primer, improving adhesion and creating a uniform base colour. The topcoat is the final layer, delivering your chosen colour and the protective finish. As outlined in this paint glossary guide, skipping any one of these steps compromises the long-term result.
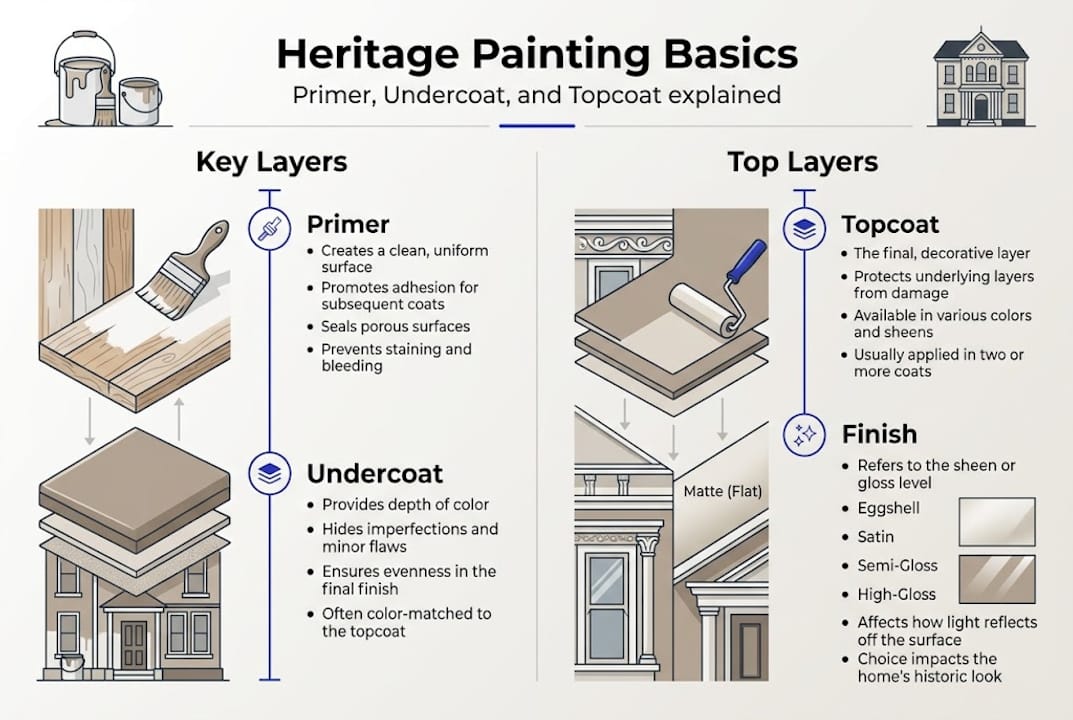
Sheen levels describe how much light a dried paint surface reflects. Here’s a quick reference:
| Sheen level | Reflectivity | Best use |
|---|---|---|
| Matt | Nil to very low | Ceilings, low-traffic walls |
| Low sheen | Subtle | Living rooms, bedrooms |
| Satin | Moderate | Hallways, timber trim |
| Semi-gloss | High | Doors, skirting boards |
| Gloss | Very high | Heritage timber detailing |
Beyond sheen, paint formulations split into two broad categories:
- Water-based (acrylic) paints: Fast-drying, low odour, and flexible. Preferred for most interior and exterior surfaces today.
- Oil-based (alkyd) paints: Slower drying but exceptionally hard-wearing. Still favoured for heritage timber trim and doors where a harder finish is needed.
Two other terms worth knowing are VOCs (volatile organic compounds, the chemicals that evaporate as paint dries and affect indoor air quality) and binders (the resin that holds pigment particles together and determines durability). Choosing low-VOC interior paints matters especially in older homes where ventilation may be limited.
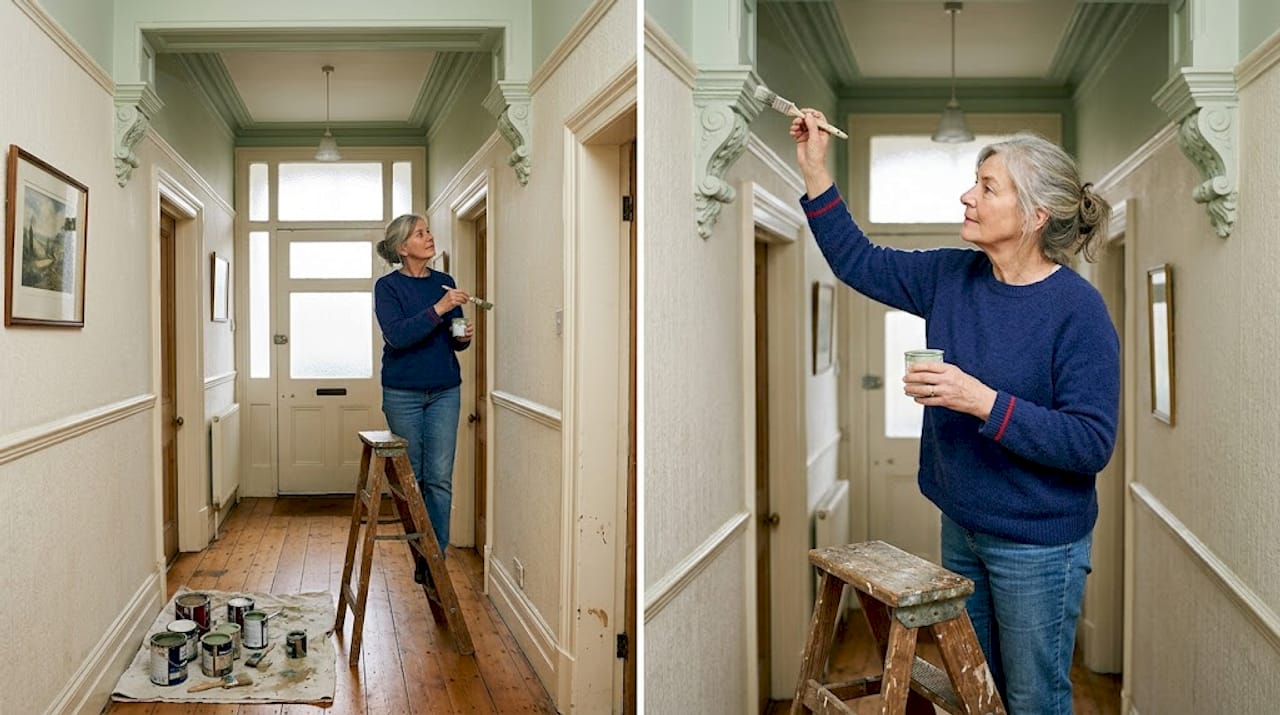
Pro Tip: If you’re painting a high-traffic hallway in a heritage home, choose a satin or semi-gloss finish. Higher sheen levels are far easier to wipe clean and resist scuffing better than matt paints, making them far more practical over the long term.
According to common painting terminology resources, many homeowners don’t realise that sheen choice affects not just appearance but also how visible surface imperfections become. The higher the sheen, the more it highlights irregularities in the wall beneath.
Essential application techniques and paint defects
Once you grasp the materials, next up are the methods and potential pitfalls. Knowing how paint should be applied helps you evaluate whether your tradesperson is doing the job correctly.
Cutting in refers to painting a precise line along edges, corners, and architraves using a brush before rolling the main surface. Done well, it creates a clean boundary that rollers can’t achieve. Laying off is the technique of finishing a wet painted surface with light, parallel brush strokes to eliminate roller marks and produce a smooth result. Back-rolling is used after spray application, where a roller is immediately run over the sprayed paint to improve penetration and eliminate runs or an uneven texture.
Identifying paint defects early is critical. Watch for these warning signs:
- Blistering: Bubbles forming under the paint film, almost always caused by moisture or heat.
- Peeling: Paint lifting away from the surface, indicating poor adhesion or surface contamination before painting.
- Craquelure: A network of fine cracks across the paint surface. As noted in art conservation terminology, craquelure develops when the paint film becomes brittle over time, often seen on older heritage interiors.
- Sagging: Paint running or dripping due to over-application or using too thin a product.
- Flashing: Patchy areas of uneven sheen, usually from inconsistent application or missed coats.
A well-prepared surface is the single greatest predictor of a long-lasting paint job. No amount of premium product compensates for inadequate surface preparation.
The application methods outlined in industry resources confirm that most defects are preventable with correct prep and skilled technique. Understanding why repainting protects value helps you see defect prevention as a financial decision, not just an aesthetic one.
Pro Tip: Walk through each room with your painter at the end of each day during a large project. Early defect spotting is far less expensive to rectify than waiting until the job is complete. A few minutes of review can save thousands in remediation work.
Heritage painting terms unique to Victorian and Edwardian homes
General painting know-how only gets you so far. Heritage homes bring their own vocabulary and challenges that require specific knowledge to navigate.
Fretwork refers to the decorative timber latticework found on verandah fascias, gable ends, and porches of Victorian properties. Painting fretwork demands patience, the right brush size, and careful masking to preserve the intricate pattern. Tuckpointing is the technique of finishing mortar joints with a fine line of contrasting putty to create the illusion of very fine joints. It’s a feature that should never be painted over, as doing so obscures the detail and is almost impossible to reverse without damaging the brickwork.
For heritage brick and render, breathable paints are essential. Limewash (a traditional lime-based coating) and mineral silicate paints allow moisture to pass through the wall rather than trapping it behind an impermeable film. Trapping moisture in old masonry accelerates deterioration. Lath and plaster walls, found in most pre-1950s Melbourne homes, require specialist repair techniques before painting to avoid cracking or delamination of the new finish.
Here is a typical heritage repainting sequence for a Victorian facade:
- Inspect and document existing paint layers and surface condition.
- Remove loose or failing paint using appropriate methods (heat gun or chemical stripper).
- Repair render, brickwork, and timber as required.
- Apply breathable primer suited to the substrate.
- Apply undercoat in the specified heritage palette colour.
- Apply two topcoats in the approved colour and sheen level.
- Reinstate decorative details including fretwork and timber trim.
| Heritage term | What it means | What to ask your painter |
|---|---|---|
| Limewash | Traditional breathable lime coating | Have you used limewash on heritage brick before? |
| Fretwork | Decorative timber lattice | How will you protect intricate detail during painting? |
| Tuckpointing | Fine mortar joint finish | Will this be masked or repaired before we paint? |
| Lath and plaster | Old wall system behind plaster | What repair method will you use before painting? |
For deeper context, the team at Sol Shine has published a detailed heritage paint guide specifically for Melbourne Victorian homes. Understanding the most costly heritage painting mistakes is equally important before any brush touches your facade, as noted by heritage restoration specialists working across period properties.
Navigating heritage overlays and paint compliance
Understanding technical terms isn’t enough. Knowing the legal language is vital for compliant work on a heritage property in Melbourne.
A Heritage Overlay (HO) is a planning control applied by local councils to properties of historical or architectural significance. Properties under a Heritage Overlay may require a planning permit before any changes to their external appearance, including repainting in a new colour scheme. This is not universal. Some councils allow like-for-like colour changes without a permit, but others require full documentation.
Key compliance terms you’ll encounter include:
- Palette: The approved set of colours specified for a property or precinct.
- Render: The external coat of cement or lime mortar applied to masonry walls, which must be repaired in a manner consistent with the original material.
- Heritage citation: A formal document describing the historical significance of a property and informing what changes are permissible.
- Permit application: A formal submission to council requesting approval to undertake specified works.
Typical approved colours for Victorian and Edwardian homes in Melbourne reflect the earth tones, deep greens, ox blood reds, and cream trims of the original period palettes. Bright or contemporary colours are rarely approved under a Heritage Overlay.
| Council term | Painter’s equivalent | What it means in practice |
|---|---|---|
| Heritage palette | Approved colour range | Only these colours are permitted |
| Render repair | Patching and recoating | Must match original mix and profile |
| Heritage citation | Property history document | Guides what can and cannot change |
| Like-for-like | Matching the existing | No change in colour or material |
For a full breakdown of relevant regulations, Sol Shine’s guide to Melbourne heritage paint standards is an authoritative starting point. You’ll also find practical maintenance tips for heritage paint that help you stay compliant long after the project is finished. As heritage property specialists confirm, ignoring a Heritage Overlay can lead to enforcement notices and expensive remediation.
Pro Tip: Contact your local council’s heritage advisor before engaging a painter. Pre-application advice is often free, and getting clarity early prevents costly delays mid-project. Some councils take six to eight weeks to process permits, so the earlier you start this process the better.
What most guides miss about painting heritage homes
Most terminology guides stop at definitions. But knowing what a word means and knowing how to apply that knowledge are very different things.
The real risk on heritage projects isn’t ignorance of terms. It’s the gap between what a homeowner pictures when they say “restoration” and what a painter assumes they mean. One party may envision stripping back to bare timber, repairing every detail, and applying authentic limewash. The other may interpret the brief as a straightforward repaint with modern acrylic. Both parties used the same word. Neither clarified the intent.
Smart homeowners use terminology to sharpen conversations, not to replace them. When you ask your painter “Will you be back-rolling after spraying?” or “Is this primer breathable enough for the existing render?” you signal that you understand the process and expect it to be done correctly. That changes the dynamic entirely.
The uncomfortable truth is that not every painter who claims heritage experience has actually worked with lath and plaster walls, period lime render, or council-approved palettes. Terminology gives you the tools to ask better questions and evaluate the answers you receive. That is where the real value lies.
Get expert help for your heritage painting project
Ready to put this knowledge into action? Here’s where to get expert support.
Sol Shine works exclusively with Melbourne homeowners on large-scale painting and heritage restoration projects, bringing specialist knowledge of period properties across Kew, Hawthorn, Camberwell, Brighton, and beyond.

Whether you’re preparing your Victorian terrace for a full facade restoration or planning an interior repaint across a heritage-listed Edwardian home, Sol Shine’s heritage painting specialists understand both the language and the practice of authentic restoration. For homeowners considering the investment, our work on boosting historic home value demonstrates what skilled, compliant restoration can achieve. If you’re ready to start with the interior, explore our Melbourne interior painting services. Get in touch today for a consultation and take the first step toward a project done with care, precision, and genuine heritage expertise.
Frequently asked questions
What’s the difference between a primer, undercoat, and topcoat?
As detailed in this paint glossary, primer prepares the surface, the undercoat ensures good adhesion and coverage, and the topcoat delivers the final colour and protection. Each layer serves a distinct purpose and skipping one compromises the result.
Why are breathable paints recommended for heritage brick?
Breathable paints like limewash allow moisture to escape from old masonry, preventing blistering and structural damage. As heritage restoration guides note, sealing old brick with impermeable modern paint traps moisture and accelerates deterioration.
What is a Heritage Overlay and why does it matter for painting?
A Heritage Overlay is a council planning control that limits changes to heritage-listed properties and may require permits before external repainting. Properties subject to one must use council-approved heritage practices or risk enforcement action.
What common paint defects should I look out for?
Blistering, peeling, and craquelure (fine surface cracking) are the most common defects to watch for, as confirmed by art conservation resources. All three are typically caused by moisture ingress or inadequate surface preparation before painting.


