
TL;DR:
- Proper surface preparation is essential for ensuring coatings bond effectively and last longer, preventing up to 80% of premature failures.
- It involves cleaning, assessing, profiling, and verifying the substrate to remove contaminants and create the right texture for adhesion.
Surface preparation is defined as the process of cleaning and profiling a substrate so that paint, coating, or finish bonds effectively and lasts. Inadequate surface preparation causes up to 80% of premature coating failures, according to the U.S. Federal Highway Administration. That single statistic explains why professional painters treat prep as the most critical phase of any renovation, not an optional warm-up. Whether you are repainting weatherboard cladding in Hawthorn or refreshing a concrete floor in a Camberwell terrace, the quality of your finish depends almost entirely on what happens before the first coat goes on.
Surface preparation involves far more than a quick sand and wipe. The full process covers assessment, contaminant removal, surface profiling, and verification before any coating is applied. Each step builds on the last. Skip one, and the coating system fails as a whole, regardless of how premium the paint product is.
What is surface preparation and why does it matter?
Surface preparation is the act of removing contaminants and creating the right surface texture so a coating can grip and cure correctly. Coatings succeed or fail as a system, and preparation is as critical as the coating product itself and the quality of its application. A fresh coat of Dulux or Taubmans applied over a poorly prepared surface will peel, blister, or delaminate within months, regardless of the product’s quality rating.
The role of surface preparation is to give the coating two things: a clean substrate free of oils, salts, dust, and loose material, and a physical profile that gives the coating something to grip. Both conditions must be met. A surface can look spotless and still carry invisible soluble salts that cause delamination from beneath. This is why visual checks alone are never sufficient for confirming surface readiness.
What are the main surface preparation methods for homeowners?
Surface preparation methods fall into four broad categories: hand and power tool cleaning, chemical cleaning, abrasive blasting, and water jetting. Each suits different substrates and contamination types.
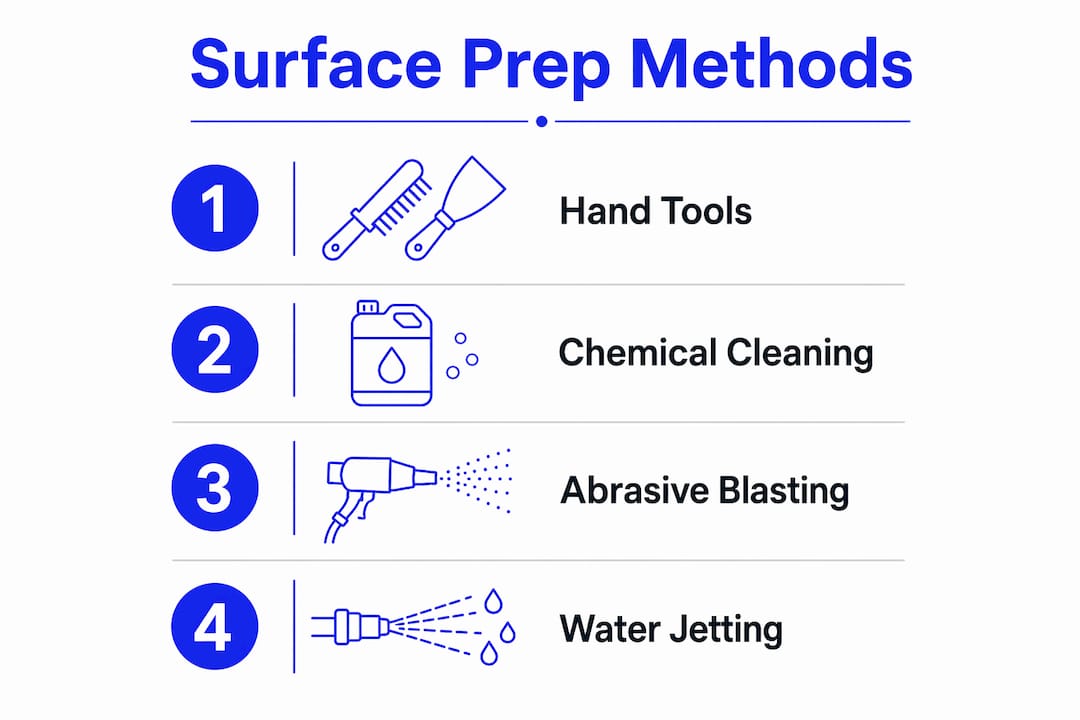
Hand and power tool cleaning
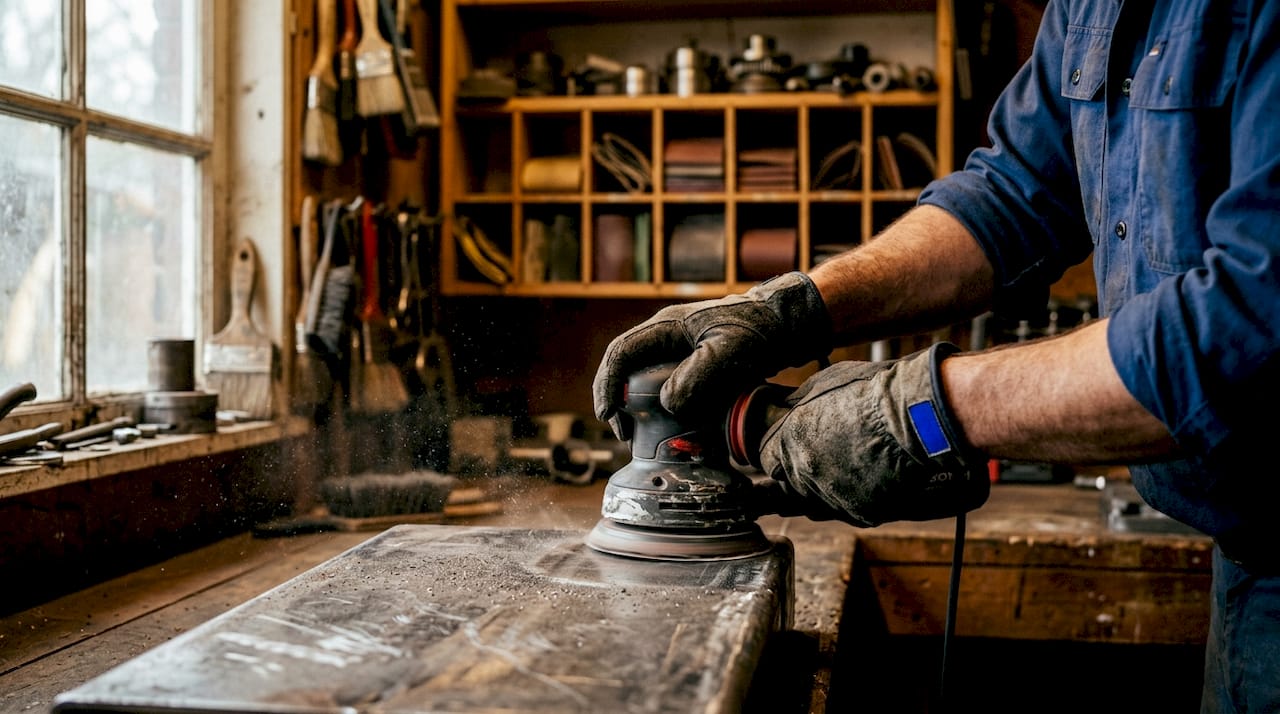
Hand sanding, wire brushing, and scraping remove loose paint, rust, and surface debris from wood and metal. Power tools such as angle grinders, orbital sanders, and rotary wire brushes speed up the process considerably. These methods are practical for most homeowners and work well on timber weatherboards, window frames, and mild steel surfaces. They do not achieve the deep cleanliness that abrasive blasting delivers, but for residential repaints they are often sufficient when paired with a thorough chemical clean.
Chemical cleaning and stripping
Chemical cleaners remove oils, grease, mould, and soluble salts that mechanical methods cannot lift. Sugar soap is the standard choice for interior walls before repainting. Solvent cleaners such as mineral turpentine or methylated spirits remove oily contamination from metal. Paint strippers, including gel-based products from brands like Dulux Duramax or Peel Away, dissolve old coatings on timber and masonry. Chemical cleaning should always precede abrasive methods on metal surfaces. Blasting over oily steel embeds the contamination into the profile rather than removing it, which guarantees coating failure.
Abrasive blasting and water jetting
Abrasive blasting, including sandblasting and soda blasting, delivers the most thorough surface profile and cleanliness. Soda blasting is gentler and suits heritage timber and decorative masonry where sandblasting would cause damage. High-pressure water jetting removes loose paint, biological growth, and surface salts from masonry and concrete without generating dust. For most homeowners, hiring a professional operator is the practical approach for blasting and jetting, as equipment costs and safety requirements are significant.
| Method | Best for | Pros | Cons | Safety notes |
|---|---|---|---|---|
| Hand sanding | Timber, plaster | Low cost, controlled | Slow, limited depth | Dust mask required |
| Power tool cleaning | Metal, timber | Fast, accessible | Surface damage risk | Eye and ear protection |
| Chemical cleaning | All substrates | Removes invisible contaminants | Requires dwell time | Gloves, ventilation |
| Abrasive blasting | Metal, concrete | Deep profile, thorough clean | Equipment cost, dust | Full PPE, professional use |
| Water jetting | Masonry, concrete | No dust, removes salts | Moisture dry time needed | Pressure injury risk |
Pro Tip: Always complete chemical cleaning before any abrasive method. On metal surfaces, this follows the SSPC-SP1 solvent cleaning standard and prevents contamination from being driven deeper into the substrate.
How do surface preparation standards affect your renovation?
Surface preparation standards define the minimum cleanliness and profile a substrate must reach before coating. Two systems matter most for homeowners: SSPC standards for steel and the ICRI Concrete Surface Profile scale for concrete.
SSPC standards, developed by the Society for Protective Coatings, classify steel cleanliness from SSPC-SP1 (solvent cleaning) through to SSPC-SP10 (near-white blast cleaning). Most residential metalwork, including wrought iron fences, steel lintels, and heritage window hardware, requires at minimum SSPC-SP3 power tool cleaning before priming. Skipping to a primer coat over rust or mill scale produces a coating that lifts within one to two seasons.
The ICRI Concrete Surface Profile scale defines nine texture levels for concrete, from CSP 1 (light acid etch) to CSP 9 (heavy scarification). Selecting the correct CSP level prevents premature delamination and maintains bond strength in concrete coatings. A thin decorative coating needs a lower CSP, while a thick epoxy floor system requires a higher profile. Using the wrong mechanical method for concrete preparation is one of the most common causes of delamination in residential floor projects.
Common verification mistakes homeowners make include:
- Relying on appearance alone to judge cleanliness
- Skipping a moisture test on concrete before applying floor coatings
- Not checking the coating manufacturer’s minimum surface profile requirement
- Applying primer immediately after wet cleaning without allowing adequate dry time
- Assuming a surface is contamination-free because it has been painted before
Common surface preparation challenges and how to avoid them
Invisible contamination is the most underestimated problem in residential surface preparation. Soluble salts are a prime example. They are undetectable by eye, yet they draw moisture through a coating film and cause blistering and delamination from beneath. Homes near Port Phillip Bay in suburbs like Brighton and Elwood are particularly exposed to salt-laden air, making thorough washing and salt testing a non-negotiable step before any exterior repaint.
Mismatching the surface profile to the coating type is another frequent error. A high-build exterior masonry paint requires a rougher profile than a thin interior acrylic. Applying a thick coating over a surface that is too smooth produces poor adhesion. Applying a thin coating over a surface that is too rough leaves peaks exposed and uncoated, creating early rust or moisture entry points.
Aggressive methods on delicate surfaces cause their own problems. Sandblasting heritage render or Victorian-era timber can remove material that cannot be replaced. Soda blasting or careful hand sanding is the correct approach for these substrates.
Practical guidance by surface type:
- Timber: Remove loose paint by scraping and sanding. Fill cracks with a flexible exterior filler. Clean with sugar soap and allow to dry fully before priming.
- Metal: Remove rust with a wire brush or angle grinder. Solvent clean with mineral turpentine. Apply a rust-inhibiting primer before topcoating.
- Concrete: Grind or acid-etch to the required CSP level. Test for moisture with a plastic sheet taped to the surface for 24 hours. Coat only when moisture content meets the product specification.
Pro Tip: On any metal surface, complete solvent cleaning before sanding or grinding. Mechanical action over an oily surface spreads contamination rather than removing it.
How to prepare common home surfaces for painting
A structured surface preparation process produces consistent results across all substrate types. The sequence is always the same: assess, clean, profile, verify, then coat.
Preparing timber surfaces
- Inspect the timber for rot, cracks, and lifting paint. Replace or repair any sections that are structurally compromised.
- Scrape away all loose and flaking paint using a stiff scraper or heat gun.
- Sand the surface with 80-grit paper to remove remaining paint edges and create a uniform profile, then finish with 120-grit for a smooth base.
- Fill cracks and nail holes with a flexible exterior filler. Allow to cure fully and sand flush.
- Wash the surface with sugar soap to remove dust, oils, and mould. Rinse and allow to dry for at least 24 hours.
- Apply a quality primer suited to the timber species and the topcoat system. For heritage homes, consult a homeowner’s surface prep guide to match primer to substrate correctly.
Preparing concrete surfaces
- Remove all surface contamination, including oil stains, using a degreaser and stiff brush.
- Grind or acid-etch the concrete to achieve the CSP level specified by your coating manufacturer.
- Vacuum and wash away all residue. Allow the concrete to dry completely.
- Test for moisture by taping a 600mm x 600mm sheet of plastic to the surface for 24 hours. Condensation on the underside means the slab is too wet to coat.
- Apply a penetrating primer or sealer before the topcoat.
Preparing metal surfaces
- Remove all rust, scale, and loose material with a wire brush, angle grinder, or abrasive disc.
- Solvent clean the entire surface with mineral turpentine or a dedicated metal cleaner.
- Sand or grind to the required profile for the primer system.
- Apply a rust-inhibiting primer within four hours of completing the mechanical clean to prevent flash rusting.
Safety considerations apply across all substrates. Wear a P2 dust mask when sanding, nitrile gloves when handling chemical cleaners, and eye protection during all mechanical work. Dispose of chemical waste according to your local council guidelines. For paint that lasts over 10 years, following each step without shortcuts is the single most reliable approach.
Key takeaways
Proper surface preparation is the foundation of every durable coating system, and skipping any step in the process is the leading cause of premature paint failure.
| Point | Details |
|---|---|
| Prep drives coating success | Up to 80% of coating failures trace back to inadequate surface preparation, not the paint product. |
| Clean before you profile | Chemical cleaning must precede abrasive or mechanical methods to avoid embedding contamination. |
| Match profile to coating | Concrete and metal surfaces need a specific texture level matched to the coating manufacturer’s requirements. |
| Invisible contaminants matter | Soluble salts cause delamination without any visible sign; testing and thorough washing are non-negotiable. |
| Verify before you coat | Visual inspection alone is insufficient; moisture tests, profile checks, and dry time confirmation are all required. |
Why surface prep is the step I refuse to rush
After years working on heritage homes across Melbourne’s inner east and bayside suburbs, the pattern I see most often is this: a homeowner invests in quality paint and a skilled applicator, then watches the finish fail within two seasons. The cause is almost always the same. The surface was not properly prepared.
The misconception I encounter most is that surface preparation is a cosmetic step. Homeowners assume that if a surface looks clean and smooth, it is ready to coat. The reality is that the most damaging contaminants, soluble salts, residual oils, and latent moisture, are completely invisible. A surface can look perfect and still be fundamentally unsuitable for coating.
What I have learned is that patience in the preparation phase pays back in years of finish life. A thorough prep on a Victorian-era weatherboard, including scraping, sanding, sugar soap washing, and priming, takes considerably longer than the painting itself. That time is not wasted. It is the reason a quality exterior repaint holds its colour and adhesion for a decade rather than peeling within two years.
My honest advice: if you are uncertain about the condition of your substrate, particularly on heritage render, old masonry, or corroded metalwork, consult a professional before committing to a coating system. The cost of getting the prep right is always less than the cost of stripping and repainting a failed job.
— Jarrad
Sol Shine’s approach to surface preparation and painting
Sol Shine brings professional-grade surface preparation to every interior and exterior painting project across Melbourne’s inner east and bayside suburbs.

Every Sol Shine project begins with a thorough substrate assessment before a single brush or roller touches the surface. The team handles scraping, sanding, chemical cleaning, and priming as part of a complete service, not as extras. For homeowners with Victorian or Edwardian homes, Sol Shine’s interior painting projects demonstrate what properly prepared and finished surfaces look like in practice. If you are planning a renovation and want a finish that holds for years, contact Sol Shine for a consultation.
FAQ
What is surface preparation in simple terms?
Surface preparation is the process of cleaning and texturing a surface before painting or coating so the finish bonds properly and lasts longer. It includes removing contaminants, old paint, rust, or loose material, and creating the right surface texture for adhesion.
Why does surface preparation cause most coating failures?
Inadequate surface preparation causes up to 80% of premature coating failures because contaminants and incorrect surface profiles prevent the coating from bonding correctly to the substrate.
What is the difference between surface cleanliness and surface profile?
Cleanliness refers to removing all contaminants including oils, salts, and dust. Surface profile refers to the physical texture or roughness of the substrate. Both must meet the coating manufacturer’s requirements for the system to perform.
Do I need to test concrete before painting a floor?
Yes. Concrete must be tested for moisture before applying any floor coating. Excess moisture causes the coating to blister and delaminate. A simple plastic sheet taped to the slab for 24 hours reveals whether the concrete is dry enough to coat.
When should a homeowner hire a professional for surface preparation?
Hire a professional when working with heritage substrates, corroded structural metalwork, or large exterior surfaces where incorrect preparation could cause costly damage or coating failure. Quality repainting on heritage homes requires specialist knowledge of substrate conditions and appropriate prep methods.


