
TL;DR:
- A well-executed exterior paint system combines compatible caulk, primer, and topcoat applied over properly prepared surfaces to protect heritage homes. Compatibility, thorough preparation, and climatic conditions are essential to prevent peeling, cracking, and premature failure, extending the system’s lifespan by up to 50 percent. Proper maintenance and understanding of product layers ensure long-lasting façades that preserve the home’s character for decades.
An exterior paint system is defined as the coordinated layering of caulk, primer, and topcoat applied in sequence to protect and preserve a building’s exterior surfaces. For owners of Victorian and Edwardian homes across Melbourne’s inner east and bayside suburbs, understanding this system is not optional. It is the difference between a façade that holds its character for a decade and one that begins peeling within two or three years. The right system, built from compatible products suited to heritage timber and local climate conditions, is what separates a lasting restoration from a costly repaint cycle.
What are the essential layers of a high-quality exterior paint system?
A well-built exterior paint system consists of three distinct layers, each with a specific function. Remove or compromise any one of them, and the entire system underperforms. The industry term for this approach is a “paint system” or “coating system,” and it is the standard professional painters use when specifying work on period properties.
Caulking is the first layer applied, sealing gaps at joints, window frames, and weatherboard ends before any primer touches the surface. 100% acrylic exterior caulk increases seal longevity by 50% compared to cheaper alternatives, making it the only appropriate choice for heritage homes exposed to Melbourne’s variable wet seasons. It remains flexible as timber expands and contracts with temperature changes, preventing moisture from tracking behind the paint film.
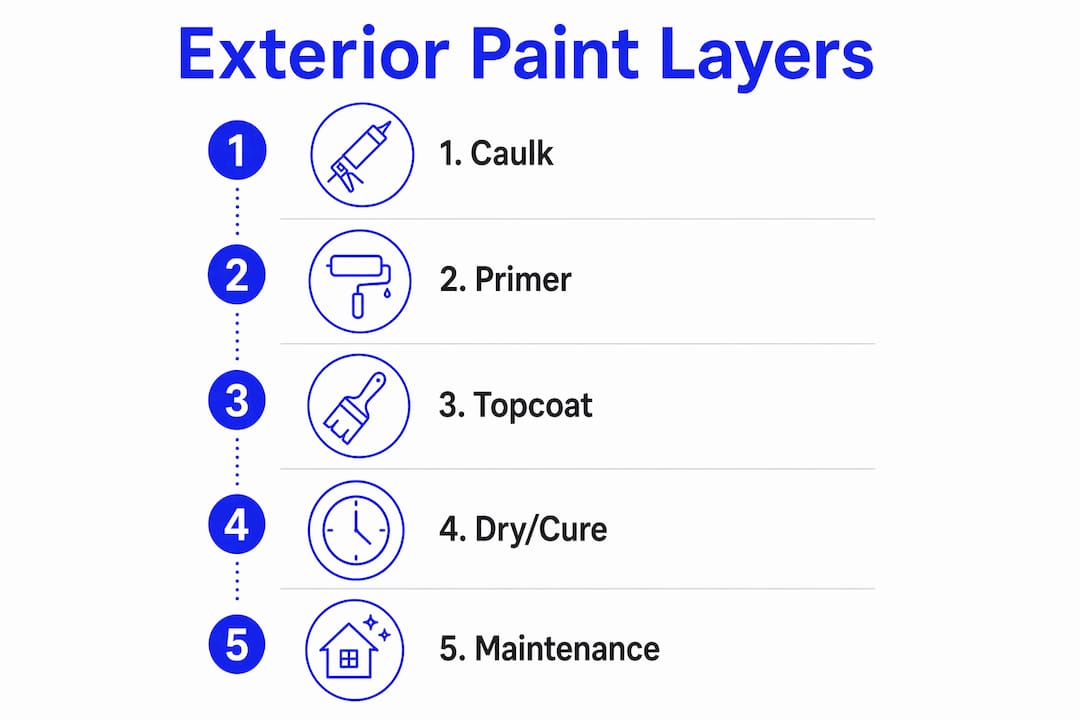
Primer is the adhesion layer. It seals bare timber, stabilises chalky or porous surfaces, and creates the mechanical bond that holds the topcoat in place. On heritage weatherboards, an alkyd oil-based primer is often preferred for bare or heavily weathered timber because it penetrates the grain more deeply than water-based alternatives. Compatibility between primer and topcoat is non-negotiable. A primer that is too soft or too rigid relative to the topcoat creates internal tension in the film.
Topcoat is the protective and decorative layer. On period homes, a quality 100% acrylic latex topcoat delivers UV resistance, moisture repellency, and the flexibility needed to accommodate timber movement across Melbourne’s seasonal temperature range. Two coats are the professional standard, not a premium upgrade.
Pro Tip: Always check that your caulk, primer, and topcoat are specified as compatible by the manufacturer. Dulux, Taubmans, and Solver all publish system guides. Using products from the same manufacturer’s exterior system removes the guesswork entirely.
Why does compatibility between layers matter so much?
Compatibility is the most misunderstood aspect of exterior painting on heritage homes. Homeowners often assume that any primer under any topcoat will work. It will not. Rigid topcoat over soft primer creates tension and delamination as the layers cure at different rates, trapping solvents and destabilising the film from within.
Period homes in Melbourne’s inner suburbs present a particular challenge. Heritage homes can carry 10 to 20 accumulated paint layers, many of which are oil-based. Applying a water-based acrylic topcoat directly over an old, glossy oil-based layer without proper preparation or a bonding primer is one of the most common causes of premature peeling on period weatherboards. Testing adhesion between existing and new coatings before committing to a full repaint is standard professional practice.
A compatible exterior paint system can extend the service life of a heritage façade by up to 50%, preventing the blistering and peeling failures that typically appear within two to three years of an incompatible repaint.
Manufacturer recoat windows matter just as much as product selection. Painting over a primer that has not fully cured traps moisture and solvents beneath the topcoat, leading to blistering. Painting outside the recoat window, when the primer has cured too hard, reduces mechanical adhesion. Both errors are avoidable by reading the technical data sheet before picking up a brush.
For guidance on selecting compatible resins suited to period-specific materials, the substrate type and existing paint history both need to be factored in before any product is chosen.
How to prepare a heritage home exterior before painting
Preparation accounts for 80% of a successful exterior paint project, covering pressure washing, scraping, and sanding. On a period home, cutting corners here is the single fastest way to waste money on quality paint.
Follow these preparation steps in order:
- Pressure wash the entire exterior at 1,500 to 2,000 PSI to remove dirt, mould, and chalky residue. Allow a minimum of 48 hours drying time before any coating is applied. Timber that feels dry to the touch can still hold moisture within the grain.
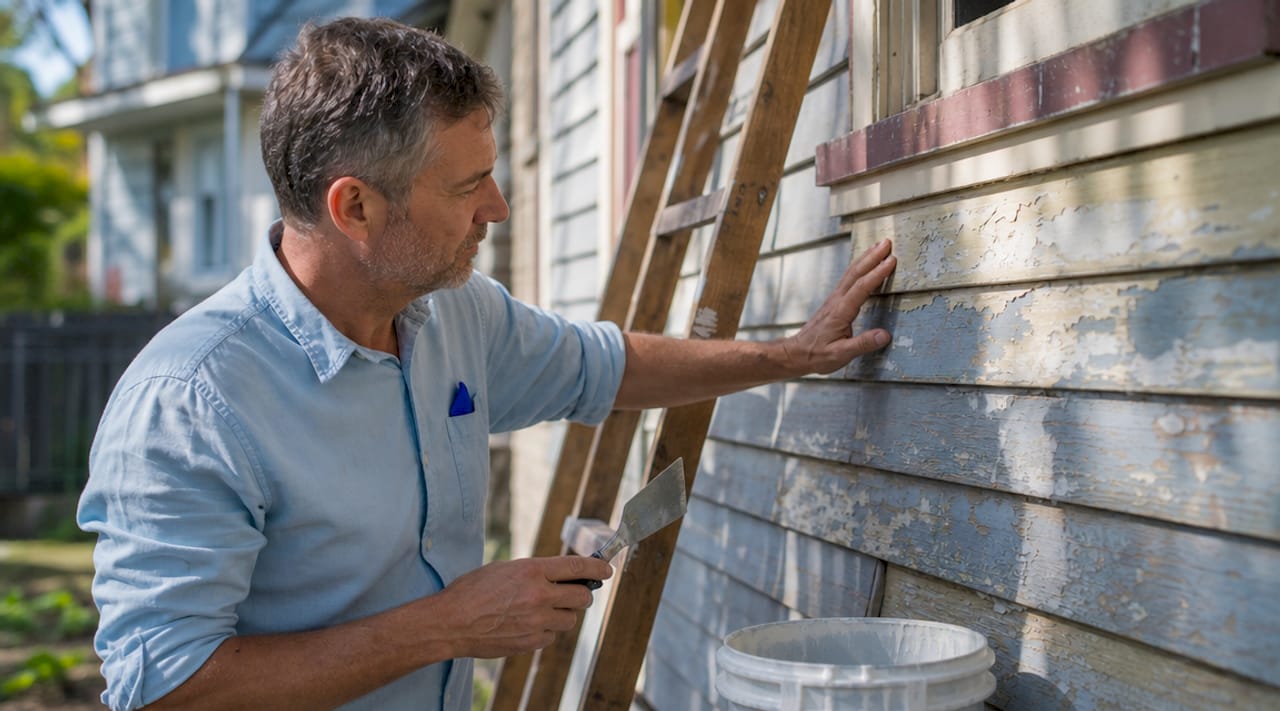
- Scrape all loose and flaking paint back to a firm edge. Do not paint over any area where the existing film is not fully adhered. On heritage weatherboards, this often means working section by section with a quality scraper.
- Sand all scraped areas with 80 to 120 grit paper, feathering the edges so there is no abrupt step between bare timber and intact paint. Unsanded edges telegraph through the topcoat and look unprofessional on a period façade.
- Repair damaged timber before priming. Rotted sections must be replaced, not filled. 40% of paint project failures on heritage homes trace back to skipping timber repairs and failing to back-prime replacement boards.
- Back-prime all replacement boards on every blind surface before installation. This seals the timber on all sides, preventing moisture ingress that causes cupping and premature paint failure from behind the board.
- Caulk all gaps and joints after priming bare areas but before the full primer coat. This sequence ensures the caulk bonds to primed timber rather than raw grain, improving adhesion and seal life.
Pro Tip: On Victorian and Edwardian homes, pay particular attention to the junction between weatherboards and window architraves. These joints open and close with every season. A flexible acrylic caulk applied in a continuous bead, tooled smooth, prevents water from tracking behind the boards where it cannot dry out.
Choosing the best exterior paint types and application techniques
Selecting the right paint formulation for a Melbourne heritage home depends on the substrate, the condition of existing layers, and the local climate. The following comparison covers the most common options:
| Paint type | Best use on heritage homes | Key advantage |
|---|---|---|
| 100% acrylic latex topcoat | Weatherboards, masonry, stucco | Flexibility, UV resistance, breathability |
| Alkyd oil-based primer | Bare or heavily weathered timber | Deep grain penetration, superior adhesion |
| Elastomeric coating | Rendered or stucco surfaces with fine cracks | Bridges hairline cracks, high moisture resistance |
| Acrylic bonding primer | Existing glossy or oil-based layers | Improves adhesion between incompatible surfaces |
Exterior painting requires at least two coats of 100% acrylic latex or a specified specialty coating, with four to six hours drying time between applications. Temperature and humidity conditions directly affect film formation. The ideal conditions for exterior painting are between 10°C and 30°C with humidity below 85%. Painting outside these parameters increases paint failure risk by up to 60%, which is a significant consideration given Melbourne’s unpredictable spring and autumn weather.
Application method matters as much as product choice. The hybrid technique of brush cutting-in combined with roller back-rolling delivers optimal adhesion and consistent film thickness across large field areas. On heritage timber trim, a quality brush remains the only appropriate tool. It works paint into the grain and around moulding profiles in a way no roller or spray gun can replicate. For broader weatherboard fields, a medium-nap roller followed immediately by back-rolling forces paint into the surface texture and eliminates lap marks.
For a detailed walkthrough of exterior painting techniques specific to period homes, the sequence of primer, intermediate coat, and topcoat application is covered in full.
Common failures in heritage exterior paint systems and how to avoid them
Most paint failures on period homes are predictable and preventable. The following issues appear repeatedly on Victorian and Edwardian properties across Melbourne’s inner suburbs:
- Skipping preparation. Painting over dirty, chalky, or loosely adhered surfaces is the leading cause of early failure. No paint system, regardless of quality, adheres reliably to a compromised base.
- Using the wrong paint type on period materials. Applying a hard, low-flexibility coating over timber weatherboards that move seasonally leads to cracking along the grain within one to two years.
- Ignoring recoat windows. Applying a second coat too early traps solvents. Applying it too late reduces inter-coat adhesion. Both errors are common when homeowners rush through a repaint.
- Painting over incompatible old layers without testing. Identifying and addressing incompatible oil-based layers before applying new acrylic paint is critical on homes with decades of accumulated coatings. A simple cross-hatch adhesion test reveals whether the existing surface will hold a new system.
- Neglecting ongoing maintenance. Caulk joints and paint film should be inspected annually. Catching a failed caulk joint or a small area of lifting paint early costs a fraction of what a full repaint requires. Cleaning the exterior every two years with a low-pressure wash removes the biological growth and grime that accelerate paint breakdown.
For additional guidance on heritage colour selection that complements the right paint system, period-appropriate palettes and resin chemistries are worth considering together.
Key takeaways
A compatible exterior paint system built from quality caulk, primer, and topcoat, applied over a properly prepared surface, is the only reliable way to protect a Melbourne heritage home’s façade for the long term.
| Point | Details |
|---|---|
| System compatibility is critical | Incompatible layers cause delamination and peeling; always match caulk, primer, and topcoat from a specified system. |
| Preparation drives longevity | Surface prep accounts for 80% of project success; skipping timber repairs causes 40% of paint failures on heritage homes. |
| Back-prime all replacement timber | Priming blind surfaces before installation prevents moisture ingress, cupping, and premature paint failure. |
| Paint in the right conditions | Apply between 10°C and 30°C with humidity below 85% to avoid film formation failures common in Melbourne’s variable climate. |
| Inspect and maintain annually | Catching failed caulk or lifting paint early prevents moisture damage and extends the full system’s service life significantly. |
What I’ve learned from painting period homes across Melbourne
By Jarrad
After years of working on Victorian and Edwardian homes across Kew, Hawthorn, Camberwell, and Brighton, the pattern I see most often is not a product failure. It is a process failure. Homeowners invest in quality paint, then watch it peel within three years because the preparation was rushed or the layers were incompatible.
The insight that changed how I think about heritage repaints is this: the weakest layer determines the durability of the entire system. Thicker paint does not fix a poorly prepared surface. A premium topcoat does not compensate for the wrong primer underneath. The system only performs as well as its least reliable component.
Period-specific materials also require more patience than modern substrates. Timber weatherboards on a 100-year-old home have been through cycles of expansion, contraction, and moisture exposure that have changed the surface chemistry. Rushing the drying time or skipping the adhesion test on old oil-based layers is where most expensive failures begin.
My honest advice to anyone planning a heritage repaint is to treat the preparation and compatibility decisions as the project itself. The painting is the final step, not the whole job. When the system is right, the result speaks for itself for a decade or more.
— Jarrad
Heritage exterior painting services in Melbourne
Sol Shine specialises in exterior painting and full heritage restoration for Victorian and Edwardian homes across Melbourne’s inner east and bayside suburbs. Every project begins with a thorough assessment of existing paint layers, substrate condition, and the compatibility requirements of the proposed system. Sol Shine uses proven, compatible coating systems suited to period timber, render, and masonry, applied under the right conditions by experienced tradespeople who understand what heritage materials demand. For homeowners in Kew, Hawthorn, Camberwell, Brighton, Malvern, and surrounding suburbs, Sol Shine’s heritage painting services cover everything from preparation and timber repairs through to the final topcoat. Explore Sol Shine’s exterior painting portfolio or get in touch to discuss your project.
FAQ
What is an exterior paint system?
An exterior paint system is the layered combination of caulk, primer, and topcoat applied in sequence to protect a building’s exterior. Each layer serves a distinct function, and compatibility between them determines how long the system lasts.
How long should an exterior paint system last on a heritage home?
A properly specified and applied exterior paint system can extend service life by up to 50% compared to an incompatible repaint, with quality systems on well-prepared heritage timber lasting 10 years or more before requiring attention.
Why is primer so important on period weatherboards?
Primer seals bare timber, stabilises existing surfaces, and creates the adhesion bond that holds the topcoat in place. On heritage weatherboards, an alkyd oil-based primer penetrates the grain more effectively than water-based alternatives, particularly on weathered or bare timber.
What causes paint to peel on old Melbourne homes?
Peeling most commonly results from incompatible paint layers, inadequate surface preparation, or painting outside the recommended temperature and humidity range. Heritage homes with accumulated oil-based layers are especially vulnerable when new acrylic coatings are applied without adhesion testing.
When is the best time to paint a Melbourne home’s exterior?
The ideal conditions are temperatures between 10°C and 30°C with humidity below 85%. In Melbourne, late spring and early autumn typically offer the most consistent painting conditions, avoiding the extremes of summer heat and winter moisture.


