TL;DR:
- Proper assessment and surface preparation are crucial for the longevity of heritage paint on Melbourne homes.
- Choosing compatible, durable, high UV resistant paints tailored to surface types ensures effective weatherproofing.
- Regular inspections, maintenance, and timely touch-ups protect heritage properties from deterioration and preserve value.
Melbourne’s climate is unforgiving on heritage properties. Victorian and Edwardian homes in suburbs like Kew, Hawthorn, and Brighton face intense UV exposure, driving rain, and rapid temperature swings that accelerate paint failure, wood rot, and structural deterioration. Neglecting weatherproof painting on a heritage home doesn’t just cost you money in repairs. It can strip away the character and value that makes these properties irreplaceable. Heritage Victoria mandates maintenance and approvals for modifications to protected properties, so getting this right matters on every level. This guide walks you through every stage of the process, from assessment to long-term maintenance, so you can protect your home with confidence.
Table of Contents
- Assessing your home and planning for weatherproof painting
- Choosing the right weatherproof paints and materials
- Surface preparation: the key to long-lasting weatherproofing
- Application techniques for superior weatherproofing
- Inspecting and maintaining your painted heritage exterior
- Why weatherproof painting for heritage homes is a long-term investment
- Trusted weatherproof painting help for your Melbourne heritage home
- Frequently asked questions
Key Takeaways
| Point | Details |
|---|---|
| Plan before painting | Assess heritage needs, check council approvals, and weather conditions before starting. |
| Choose durable products | Select paints and primers suited for Melbourne’s climate and traditional building materials. |
| Prioritise thorough prep | Surface cleaning, repairs, and priming are the foundation of lasting weatherproofing. |
| Apply carefully | Follow recommended application steps and drying times for best results. |
| Maintain regularly | Inspect annually and address issues quickly to preserve both protection and heritage value. |
Assessing your home and planning for weatherproof painting
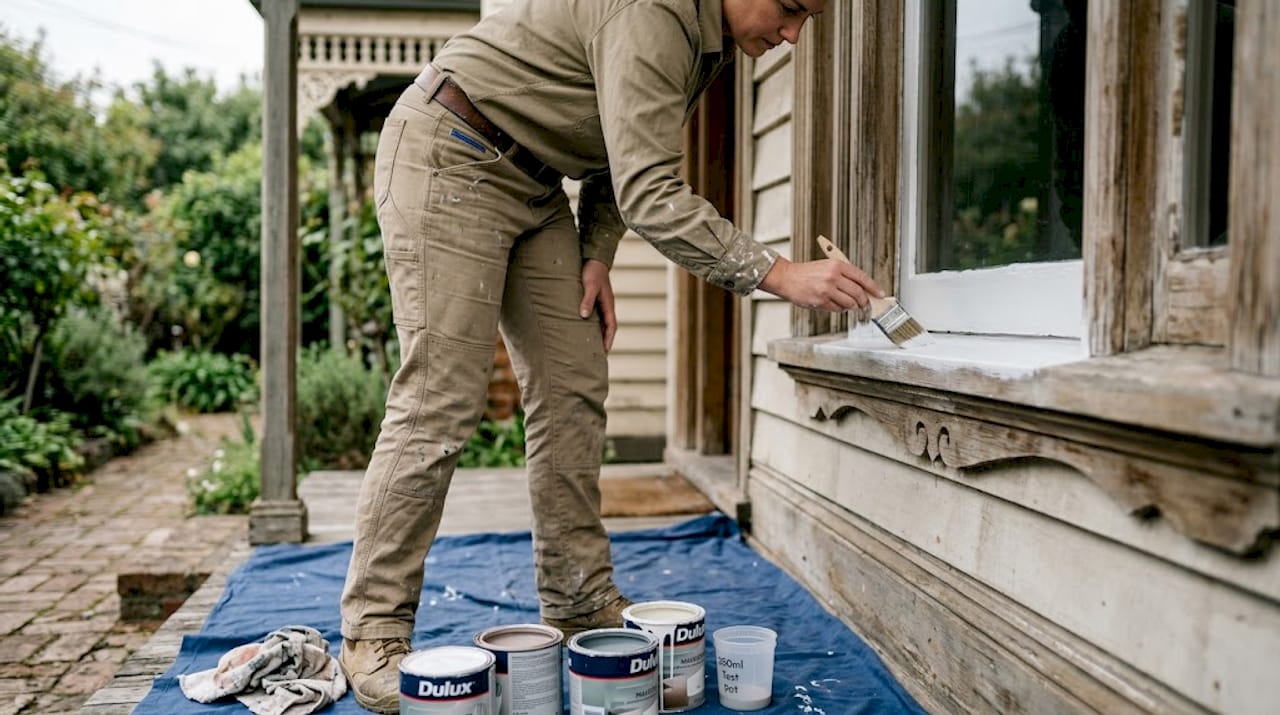
With the importance established, the first step is to assess and plan before you pick up a paint brush. A thorough assessment prevents costly surprises and ensures your weatherproofing effort targets the right areas first.
Start by walking your property and checking the following components:
- Timber elements: Weatherboards, window frames, fascias, soffits, verandah posts, and decorative fretwork. Look for softness, cracking, cupping, or paint that is peeling away from the grain.
- Metal elements: Cast iron lacework, gutters, downpipes, and wrought iron gates. Check for rust, pitting, and loose sections.
- Masonry elements: Rendered façades, brick piers, and bluestone details. Look for cracks, rising damp staining, and crumbling mortar.
- Roof and junctions: Check where rooflines meet walls, and inspect around chimneys and dormers for water ingress points.
Once you’ve identified damage, separate heritage fabric (original cornices, lacework, leadlight windows) from surfaces simply needing preparation and fresh paint. This distinction matters because Heritage Victoria requires approvals for changes that alter the character of a listed property. Repainting in matching colours generally doesn’t trigger approvals, but changing materials or profiles does. Always confirm requirements with your local council and Heritage Victoria before committing to any scope of work.
Timing your project correctly is equally important. Ideal painting conditions in Melbourne fall between 10°C and 35°C with low humidity. Early autumn and late spring typically offer the most stable windows. Avoid scheduling exterior work during heatwaves or when rain is forecast within 48 hours.
| Component | Inspection focus | Action if damaged |
|---|---|---|
| Timber weatherboards | Softness, rot, cupping | Repair or replace before painting |
| Cast iron lacework | Rust, pitting, loose sections | Sand, prime, and repaint |
| Rendered façades | Cracks, spalling, damp staining | Render repair before painting |
| Window frames | Gaps, failed glazing putty | Re-putty and prime before topcoat |
For a detailed walkthrough of the full process, Sol Shine’s step-by-step exterior painting guide covers heritage-specific sequences in depth. You’ll also find practical painting maintenance tips that work alongside your assessment findings. Reviewing how to weatherproof for longevity provides useful context on the broader principles that apply to timber-rich structures.
Pro Tip: Photograph every area of concern during your inspection. These images become your baseline record for tracking change over time and are invaluable if you ever need to demonstrate due diligence to your council or insurer.
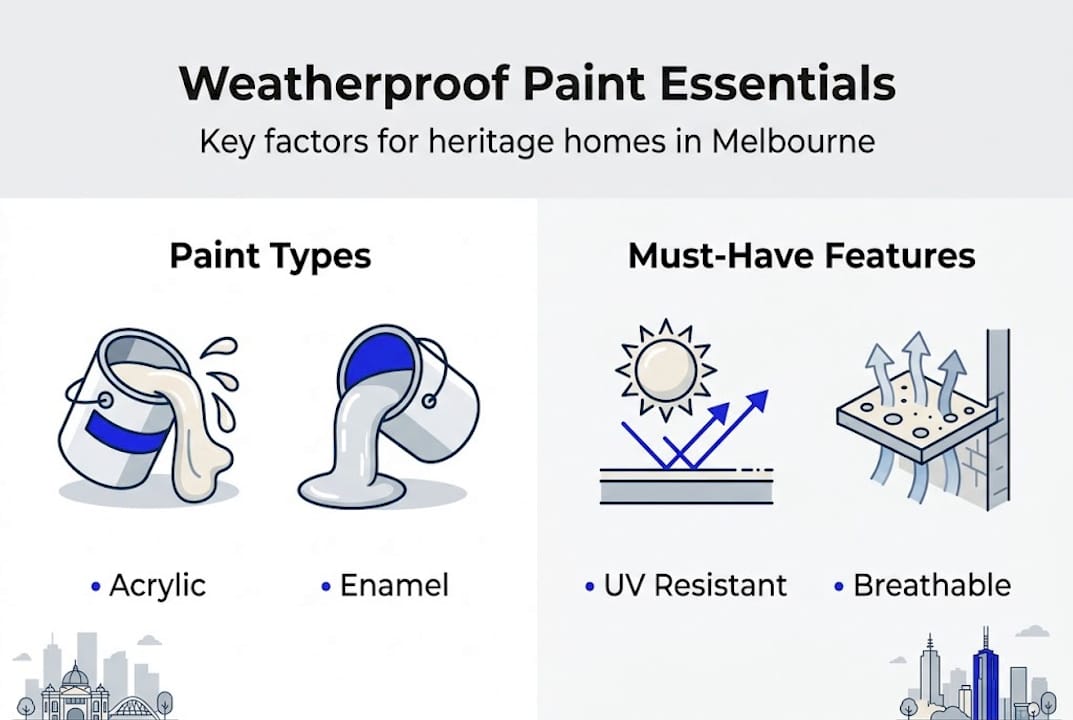
Choosing the right weatherproof paints and materials
Once your plan is set, your next move is to select the right paints and materials for long-term results. Product selection on a heritage home is not simply about colour. It’s about compatibility, durability, and long-term performance against Melbourne’s specific conditions.
For heritage timber, exterior-grade acrylic paints have largely replaced traditional oil-based options because they remain flexible as timber expands and contracts with temperature changes. However, oil-based products still have a place on dense hardwoods and in heritage contexts where a more traditional finish is specified. Always confirm compatibility with the existing paint system before choosing.
For cast iron and wrought iron, a rust-inhibitive primer followed by a hard-wearing enamel topcoat is the standard approach. The primer does the heavy lifting, creating a chemical barrier against moisture. Never skip it on bare or corroded metal.
For rendered masonry, breathable masonry paints are essential. Trapping moisture behind an impermeable coating on an older lime-rendered home causes blistering and accelerated render failure. Look for products with a high moisture vapour transmission rating.
| Surface type | Recommended primer | Recommended topcoat |
|---|---|---|
| Heritage timber | Acrylic wood primer | Exterior acrylic or oil-based |
| Cast iron lacework | Rust-inhibitive metal primer | Hard-wearing enamel |
| Lime render masonry | Masonry sealer | Breathable masonry paint |
| Hardwood window frames | Oil-based wood primer | Oil-based gloss or semi-gloss |
For Melbourne’s UV intensity and rainfall, look for paints rated for high UV resistance and those tested against temperature cycling. Premium products extend paint lifespan on heritage surfaces significantly compared to standard trade options. Understanding the key paint durability factors helps you make confident product choices, and comparing premium vs standard paint will clarify where spending more upfront pays dividends. For context on how external finishes options perform in varying climates, reviewing specialist guidance is worthwhile.
Pro Tip: Always purchase a small test pot and apply it to a discreet section before committing to full production. Heritage colours can shift dramatically between the colour chip and the actual façade, especially in full Melbourne sunlight.
Surface preparation: the key to long-lasting weatherproofing
With your materials gathered, the real foundation of weatherproofing success lies in thorough preparation. Poor preparation is the single most common reason paint fails early on heritage homes. No amount of premium product will compensate for inadequate surface prep.
Follow this sequence for best results:
- Clean all surfaces. Remove dirt, mould, algae, and chalky residue using a low-pressure wash combined with a suitable cleaning solution. High-pressure washing can damage soft heritage timber and dislodge fragile render.
- Test for lead paint. Homes built before 1970 almost certainly contain lead paint. Use a lead test kit or engage a specialist. If lead is present, avoid dry sanding or heat stripping. Wet scraping with full PPE is the safer approach.
- Remove failed paint. Scrape back all loose, flaking, or peeling paint to a firm edge. Feather the edges with fine-grit sandpaper to avoid visible ridges under the new coat.
- Repair damaged surfaces. Fill cracks, gaps, and nail holes with appropriate exterior-grade fillers. For timber, use a flexible filler that moves with the wood. For render, match the original mix as closely as possible to avoid differential cracking.
- Sand all surfaces. Lightly sand primed and filled areas to create a key for the topcoat. Wipe down with a damp cloth and allow to dry fully.
- Apply primer. Match your primer to the surface type as outlined in the previous section. A well-applied primer is the difference between paint that lasts and paint that peels. Proper preparation ensures paint lasts over ten years when done correctly.
“Surface preparation accounts for 80% of a successful paint job. The best paint in the world fails on an unprepared surface.” This is a principle Sol Shine applies consistently across every heritage project.
For guidance on quality outcomes, reviewing quality wood and paint prep is helpful context. Understanding how paint protects heritage exteriors reinforces why every preparation step directly impacts the longevity of the finished work.
Application techniques for superior weatherproofing
Preparation done, the next step is to apply your chosen products the right way for true weather protection. Even excellent paint applied poorly will underperform. Technique and timing matter as much as product quality.
Follow this application sequence:
- Apply primer coats first. Allow full drying time as specified on the product data sheet. Do not rush this stage. Inadequate drying between coats traps solvents and causes adhesion failures.
- Apply undercoat where specified. Some heritage paint systems include a dedicated undercoat between primer and topcoat. This builds film thickness and improves coverage, particularly on previously painted surfaces.
- Apply two topcoats. A single topcoat is rarely sufficient on exposed heritage exteriors. Two full coats, applied at the correct spreading rate, deliver the film thickness needed for genuine weather protection.
- Work systematically across the façade. Paint from top to bottom, completing one full wall section before moving to the next. This prevents lap marks and ensures consistent coverage.
- Pay close attention to detail elements. Fretwork, window glazing bars, verandah brackets, and wrought iron lacework require careful brush work. These elements are architecturally defining and often the first to show paint failure if rushed. Correct application methods extend the life of heritage paints substantially on these intricate surfaces.
- Allow full cure time before exposure. Most exterior acrylics reach full hardness within 7 to 14 days. Avoid washing or scrubbing newly painted surfaces during this period.
Melbourne’s weather demands flexibility in your schedule. Avoid painting in direct sun during summer, which can cause paint to skin over before it adheres properly. Early morning or late afternoon work is preferable during warmer months. If rain is approaching, stop work at least two hours before the front arrives. Reviewing waterproofing tips offers additional context on managing weather variables.
For roof elements, Sol Shine’s roof painting workflow outlines the specific sequencing for heritage rooflines.
Pro Tip: Use a high-quality synthetic brush for cutting in around windows and ornamental details. Cheap brushes leave drag marks and bristle deposits that are visible in raking light and detract from the finished result.
Inspecting and maintaining your painted heritage exterior
With paint applied, the job isn’t finished. True weatherproofing depends on smart, regular aftercare. Consistent inspections allow you to catch minor issues before they become expensive problems.
In the weeks immediately after completing your project:
- Check all painted surfaces for holidays (missed spots), runs, or areas of thin coverage.
- Inspect window and door frames for any cracking at joints where different materials meet.
- Verify that all caulked gaps remain sealed and have not pulled away during the curing process.
At annual intervals, conduct a systematic inspection covering:
- Check for early signs of paint film failure including chalking, hairline cracks, or colour fading.
- Look for rust bleed from nails or metal fixings. Address these early with spot sanding, priming, and touch-up painting.
- Clear gutters and downpipes and inspect where they attach to fascias for water staining or rot.
Regular maintenance is critical for heritage exteriors and extends the full repaint cycle considerably when done consistently. For long-term planning, understanding expected long-term paint outcomes helps you budget and schedule proactively. Heritage Victoria also provides official maintenance guidelines that set out owner responsibilities.
| Inspection timing | Key areas to check | Recommended action |
|---|---|---|
| 2 to 4 weeks post-project | Coverage, runs, caulking | Minor touch-ups as needed |
| Annual inspection | Film integrity, rust, water staining | Spot repairs and recording |
| Every 5 years | Full condition assessment | Professional inspection recommended |
| Every 10+ years | Full repaint assessment | Plan and schedule full repaint |
Why weatherproof painting for heritage homes is a long-term investment
Looking past the technical steps, it’s worth understanding why every detail matters for your family’s future and Melbourne’s heritage legacy. At Sol Shine, we’ve seen both outcomes. Properties where owners invested in correct preparation, premium materials, and regular maintenance have held their value, attracted buyers, and remained structurally sound after decades. Properties that took shortcuts often required full remediation within five years, costing far more than the original work would have.
The most common regret we hear from homeowners is waiting too long. A failed paint system doesn’t protect timber from moisture. Moisture causes rot. Rot spreads to structural elements. What began as a painting project becomes a joinery or weatherboard replacement job costing multiples of the original quote.
Investment in correct weatherproof painting is directly linked to property value. Sol Shine’s work on restoration boosting value demonstrates that well-maintained heritage homes in Melbourne’s inner suburbs consistently command premium prices. The financial case is clear, but beyond numbers, there is genuine pride in stewarding a piece of Melbourne’s architectural history for the next generation.
Trusted weatherproof painting help for your Melbourne heritage home
If this all sounds overwhelming or you value expert results, here’s how to get support from specialists.
Sol Shine brings together skilled painters and heritage restoration tradespeople under one roof, so your project is handled with the expertise it deserves from start to finish.

Whether you need a full heritage repaint, guidance on compliance with Heritage Victoria, or urgent repairs ahead of winter, Sol Shine has the experience and the team to deliver. View completed work in the heritage painting gallery and exterior painting projects to see the quality of finish achievable on Victorian and Edwardian homes across Melbourne’s inner east, bayside, and surrounding suburbs.
Frequently asked questions
Do I need a permit to repaint my Melbourne heritage house?
If you’re not changing colours or materials, you generally don’t need a permit. However, always confirm with Heritage Victoria and your local council, as Heritage Victoria requires approvals for modifications that affect the character of a listed property.
How often should weatherproof paint be reapplied on heritage homes?
With correct prep and quality products, expect a full repaint cycle of 10 or more years. Premium products extend paint lifespan considerably, though annual checks and minor touch-ups remain important between full repaints.
What’s the best paint for Melbourne’s weather on Victorian timber?
A high-quality exterior-rated acrylic or oil-based heritage paint, matched to the original finish type, delivers the best protection against UV and rain. Understanding your paint durability options helps you choose the right product for each surface.
How do I safely remove old lead paint from my historic home?
Always wear appropriate PPE, avoid dry sanding or heat stripping, and engage a licensed professional if you are unsure. Proper surface preparation guidance covers lead-safe practices that protect both occupants and tradespeople during the process.


