TL;DR:
- Paint bubbling occurs when the paint film loses adhesion to the surface, forming raised pockets filled with air or moisture. It is primarily caused by trapped moisture, surface contamination, extreme temperatures, incompatible paints, or application errors, often requiring proper surface preparation and addressing underlying issues to prevent recurrence. Repair involves removing loose paint, sanding, fixing moisture problems, priming, and repainting under suitable conditions to ensure durability and prevent future bubbling.
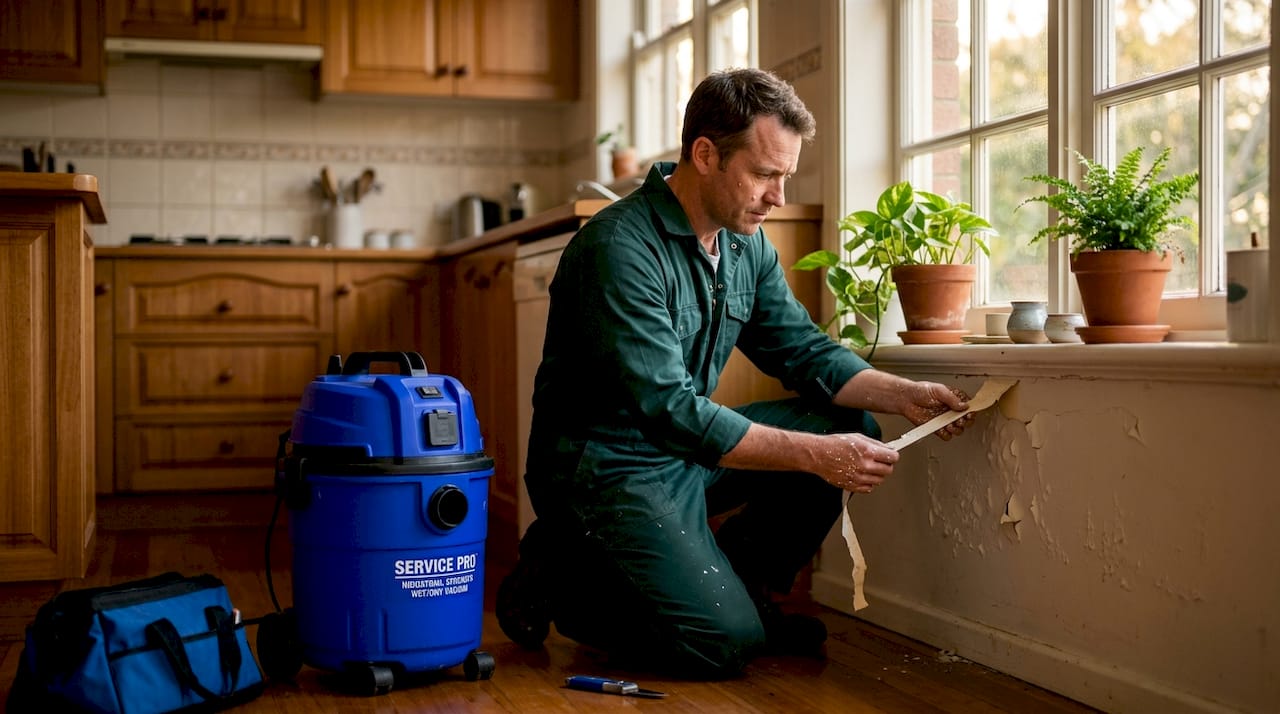
You paint a wall with care, let it dry, and step back to find raised, spongy bumps scattered across the surface. Paint bubbling is one of the most common and frustrating results homeowners encounter, and it rarely signals a simple cosmetic issue. More often, those bubbles point to moisture, surface contamination, or application errors that need proper attention. This guide explains exactly what causes paint bubbling, how to repair it correctly, and how to stop it from coming back.
Table of Contents
- Key takeaways
- What is paint bubbling?
- Common causes of paint bubbling
- How to fix paint bubbling
- Preventing paint bubbling on your home
- My take on paint bubbling after years in the field
- Get professional help with persistent paint issues
- FAQ
Key takeaways
| Point | Details |
|---|---|
| Paint bubbling explained | Bubbles form when the paint film loses adhesion to the surface beneath it, trapping air or moisture. |
| Moisture is the main culprit | Leaks, humidity, and wet surfaces are responsible for the majority of paint bubbling cases. |
| Preparation prevents problems | Thorough cleaning, drying, and priming before painting dramatically reduces the risk of bubbling. |
| Fix it properly or it returns | Skipping steps like full surface drying or priming after removal will cause bubbling to reappear. |
| Persistent bubbling needs professional assessment | When bubbling recurs despite repairs, it often signals underlying structural moisture or mould. |
What is paint bubbling?
Paint bubbling is the formation of raised, dome-shaped pockets beneath a dried paint film. These pockets develop when the bond between the paint layer and the substrate breaks down, allowing trapped air, moisture, or solvent vapour to push the paint away from the surface. The result is a surface that looks blistered, uneven, and visually degraded.
It helps to understand the difference between related paint defects, because they are often confused:
- Bubbling or blistering: Raised pockets that may still be intact. The paint film has lifted but not yet broken.
- Peeling: The paint film has cracked or separated from the surface and is lifting away in sheets or flakes.
- Cracking: The dried paint film fractures across its surface, usually from age, brittleness, or incompatible layers.
- Cratering: Small, crater-like depressions in the wet paint surface caused by contamination or surface tension issues during application.
Paint bubbling results from local adhesion loss and the lifting of the paint film. This can occur in a single coat or through multiple layers, depending on where the adhesion failure happens. On timber weatherboards, for example, moisture can travel through the timber grain and push against the paint film from underneath. On plaster or drywall, a patch of contamination or residual moisture from a previous leak can create the same effect.
The paint’s chemistry also plays a role. Acrylic and latex paints are more flexible, which gives them better resistance to minor movement in substrates. However, they are still susceptible to bubbling if applied over a surface that is too smooth, too contaminated, or too wet for the paint to grip properly.
Common causes of paint bubbling
Understanding why paint bubbles is the fastest route to fixing it and preventing it from returning. The causes fall into several clear categories.
Moisture and water intrusion
Moisture is the single most common cause of paint bubbling. It can originate from a roof leak, rising damp, condensation on a cold wall, or simply painting over a surface that has not dried adequately. Bubbling paint can signal mould beneath the surface due to trapped moisture that creates a humid microenvironment. This is particularly common in bathrooms, laundries, and areas near downpipes or gutters. If you see bubbling reappear in the same spot after repainting, a moisture source is almost certainly the cause.
Surface contamination
Dirt, grease, or wet surfaces prevent proper paint adhesion and promote bubbling. Oil from hands, kitchen splatter, cleaning product residue, and dusty or chalky old paint all create a barrier between the new paint and the substrate. The paint appears to bond initially but fails once it dries and begins to contract.
Temperature extremes during application
Painting in temperatures below 10°C or above 35°C increases the risk of bubbling significantly. Cold temperatures slow drying too much and allow moisture to become trapped. Heat causes the surface of the paint to skin over quickly while solvents remain below, creating internal pressure that pushes the film up. Direct sunlight on a hot exterior wall is a particularly common scenario for this type of bubbling.
Incompatible paint types
Applying flexible latex paint over hardened oil paint can cause air bubbles and adhesion failure. The two paint types have different movement and flexibility characteristics, and without proper bonding primer between them, the layers work against each other. This is a frequent issue in older Melbourne homes where oil-based paints were used historically and acrylic topcoats are applied decades later without correct preparation.
Application errors
Applying heavy coats or subsequent coats before the first dries traps solvents and air beneath the surface, which then forces its way out as the paint cures. Rolling too quickly or working in one area repeatedly can also introduce air into the wet film.
The table below summarises the key causes and their most recognisable effects:
| Cause | Effect on paint |
|---|---|
| Trapped moisture | Bubbles that reappear after repainting |
| Surface contamination | Poor adhesion, early peeling |
| Extreme temperatures | Skinning, blistering, uneven drying |
| Incompatible paint types | Lifting layers, widespread bubbling |
| Thick or premature coats | Air pockets, cratering, solvent blistering |
Pro Tip: If bubbles appear within hours of painting, the cause is almost always application related. If they appear days or weeks later, moisture from within the substrate is the more likely culprit.
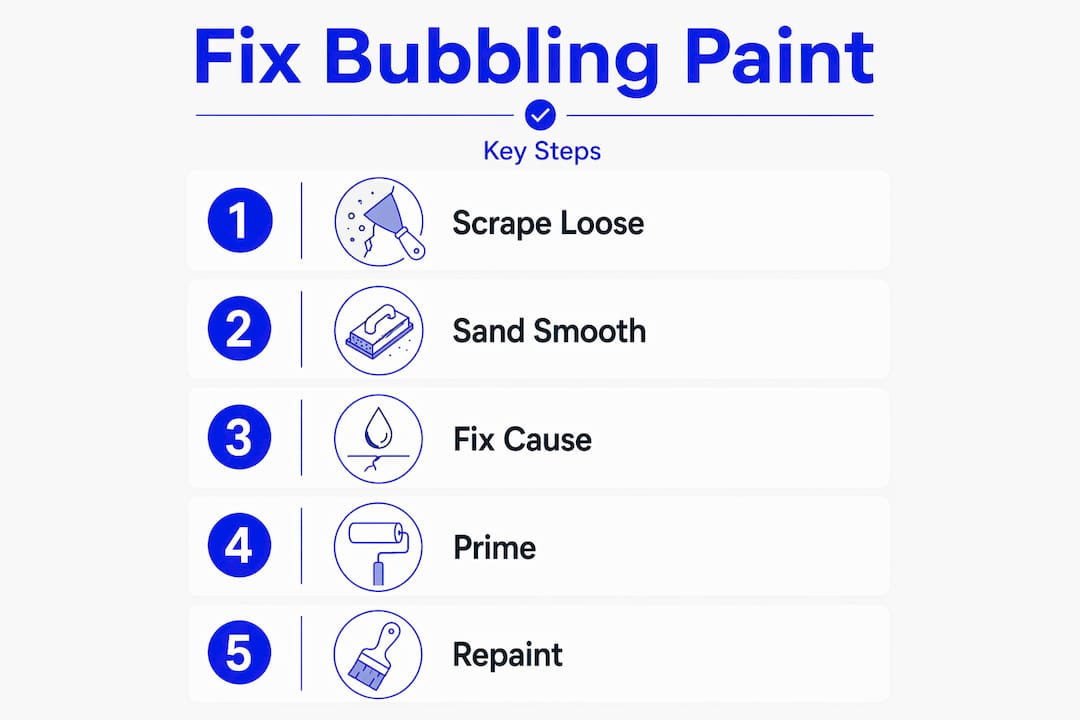
How to fix paint bubbling
Repairing bubbled paint correctly takes patience, but the process is straightforward when you follow the right steps. Cutting corners here is the primary reason bubbling returns.
-
Allow the paint to fully cure before starting. Fresh paint that is still soft can be damaged further during repair. Give it at least 24 to 48 hours, or longer in humid conditions.
-
Scrape away all bubbled and loose paint. Use a quality scraper or putty knife to remove everything that has lifted. Do not stop at the obvious bubbles. Run the scraper across the surrounding area to check for any paint that sounds hollow or feels loose.
-
Sand the affected area smooth. Once the loose paint is removed, sand the edges of the repair zone to feather them out so there is no abrupt ridge where old paint meets bare substrate. Use 120 to 180 grit sandpaper for this step.
-
Identify and address the underlying cause. This is the step most DIYers skip, and it is the reason so many repairs fail. If moisture caused the bubbling, find the source. Check for leaks, improve ventilation, or allow the surface to dry completely. Untreated bubbling paint can indicate ongoing moisture damage that weakens your home’s structure, so this step is non-negotiable.
-
Clean the surface thoroughly. Wipe down the repair area with a sugar soap solution to remove any grease, dust, or residue. Allow it to dry completely before proceeding.
-
Apply a suitable primer. Sanding smooth, re-priming, and repainting after the surface dries fully is the correct sequence. Choose a water-based primer for interior work or an oil-based primer for exterior surfaces prone to moisture exposure. On heritage timber homes, a quality flexible primer compatible with your topcoat is worth the extra investment.
-
Repaint in appropriate conditions. Choose a mild, dry day for exterior work. For interiors, avoid painting in rooms with high humidity. Apply two thin coats rather than one thick coat, allowing full drying time between each.
-
Check your tools. A worn or incorrect roller nap can introduce air into the paint film. Use a roller appropriate for the surface texture: a short nap for smooth surfaces and a longer nap for textured or rough substrates.
Pro Tip: Before repainting, lightly dampen the repair zone and check how quickly it dries. A surface that stays wet for longer than expected may still hold residual moisture and will bubble again if painted over prematurely. You can find detailed surface preparation guidance that outlines how to test and prepare correctly.
Preventing paint bubbling on your home
Prevention is far less costly than repair, and most bubbling problems are avoidable with the right habits. These are the practices that make the biggest difference.
- Clean and dry surfaces completely before painting. Even a surface that looks clean can carry oils, dust, or fine chalky residue from old paint. A thorough wash with sugar soap and adequate drying time removes the contamination that causes adhesion failure.
- Check humidity and temperature conditions. Avoid painting when rain is forecast within 24 hours of an exterior coat. For interior work, run a dehumidifier in damp rooms before and during painting. Moisture control and ventilation are key factors in preventing bubbling and mould growth under paint.
- Use the right primer for the substrate. A quality primer bonds the topcoat to the surface and seals moisture out. Skipping primer to save time is one of the most common reasons paint fails within a year or two, particularly on timber weatherboards and rendered facades.
- Choose high-quality, flexible paint. Premium acrylic paints have better elasticity and moisture resistance than budget alternatives, which means they handle minor substrate movement and humidity fluctuations with far less risk of lifting.
- Apply thin, even coats. Two thin coats will always outperform one thick coat for durability and adhesion. Allow each coat to dry to the manufacturer’s recommended recoat time before applying the next.
- Maintain your paintwork regularly. Inspect painted surfaces each year for early signs of bubbling, cracking, or peeling. Catching a small area of adhesion failure early prevents it from spreading into a large repair project. Sol Shine has produced practical maintenance advice for Melbourne homeowners looking to extend the life of their paintwork between major repaints.
For homeowners with heritage properties, there is an additional consideration. Older homes often have multiple layers of different paint types built up over decades. Understanding what is on the surface before you paint over it is the single most effective step you can take to prevent incompatibility-related bubbling.
My take on paint bubbling after years in the field
I have seen hundreds of paint bubbling cases across Melbourne homes, and the pattern is almost always the same. The homeowner or tradesperson did the visible work correctly. The surface looked clean, the paint went on smoothly, and it looked fine for a few days. Then the bubbles appeared.
In most of those cases, the problem was not the painting. It was what happened before the brush ever touched the wall. A damp patch that was not fully dry. A glossy wall that was not sanded. An old oil-based undercoat that was not primed before a water-based topcoat went over it.
The other mistake I see constantly is rushing the fix. Someone scrapes the bubbles off, slaps on a fresh coat, and calls it done. Two weeks later, the same bubbles are back, sometimes larger. You cannot repaint over a problem. You have to resolve it first.
My honest advice: if bubbling has returned to the same spot more than once, stop repainting it yourself and get someone to look at the substrate. There is very likely a moisture source, whether that is a slow leak, condensation, or rising damp, that will keep destroying the paint until it is properly addressed. The painting is the last step, not the solution. Reviewing common heritage painting mistakes before starting any repaint project is worth your time, particularly on older properties where the substrate history is unknown.
— Jarrad
Get professional help with persistent paint issues
Paint bubbling that keeps returning, or that covers large areas of a heritage façade, is rarely a DIY job. It signals moisture, substrate damage, or material incompatibility that takes proper diagnosis and skilled repair to resolve correctly.

Sol Shine is a Melbourne-based painting and heritage restoration specialist with deep experience in diagnosing and repairing complex paint failures across interior and exterior surfaces. Whether it is a damp weatherboard façade in Brighton or a plaster ceiling in a Victorian terrace in Fitzroy, the team brings the same level of care and preparation to every project. Explore Sol Shine’s interior painting projects or exterior painting services to see the standard of work applied to Melbourne homes across the inner east and bayside suburbs.
FAQ
What is paint bubbling?
Paint bubbling is when the dried paint film lifts away from the surface, forming raised dome-shaped pockets filled with air, moisture, or solvent vapour. It results from a loss of adhesion between the paint layer and the substrate.
Why does paint bubble after painting?
Paint bubbles shortly after application when coats are applied too thickly, when the surface was contaminated, or when conditions were too hot or too cold. Bubbles that appear days or weeks later typically indicate trapped moisture from within the substrate.
How do I fix bubbling paint properly?
Fixing bubbling paint requires scraping away all loose paint, identifying and addressing the underlying cause, sanding smooth, applying a suitable primer, and repainting with thin coats in appropriate conditions.
Can bubbling paint be a sign of mould?
Yes. Bubbling paint can indicate mould beneath the surface, particularly where the bubbling is caused by trapped moisture. This is most common in bathrooms, laundries, and areas near plumbing or roof leaks.
How do I prevent paint from bubbling in future?
The most effective prevention is thorough surface preparation: clean and fully dry surfaces, use a quality primer suited to the substrate, apply paint in moderate temperature and humidity conditions, and allow adequate drying time between coats.


