
TL;DR:
- Proper exterior cleaning requires understanding surface materials and applying the correct pressure and chemicals to avoid damage. Soft washing with biodegradable surfactants is preferable for most residential surfaces, while high-pressure washing suits only hard materials like concrete or brick. Regular maintenance and careful preparation help preserve your home’s value and prevent costly repairs.
You’ve given your home’s exterior an occasional hose down, yet it still looks tired, streaked, or covered in a film of grime. That’s one of the most common frustrations for homeowners. The issue isn’t effort. It’s method. Done incorrectly, exterior cleaning can force water behind cladding, strip paint, or void manufacturer warranties. Done properly, this exterior cleaning step by step guide will show you exactly how to restore your home’s façade safely, using the right pressure, the right chemistry, and the right sequence for each surface.
Table of Contents
- Key takeaways
- Understanding your exterior materials
- Preparing your home for exterior cleaning
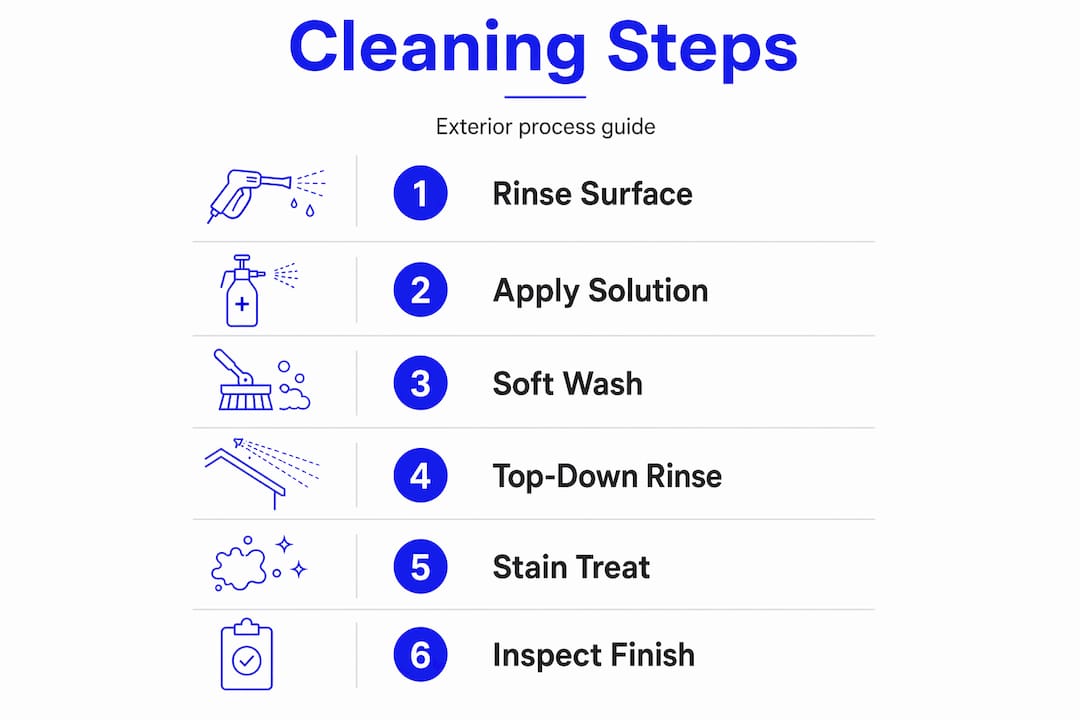
- The exterior cleaning process, step by step
- Common mistakes to avoid
- Maintaining results over time
- My take on cleaning versus damage
- Ready to take the next step after cleaning?
- FAQ
Key takeaways
| Point | Details |
|---|---|
| Know your materials first | Different surfaces need different pressure levels and cleaning products before you begin. |
| Preparation prevents damage | Protecting plants, fixtures, and sealing gaps before you start avoids costly repairs. |
| Apply bottom-up, rinse top-down | This technique prevents streaking and stops dirty water from running over clean sections. |
| Soft washing beats brute force | Low-pressure soft washing with biodegradable surfactants removes mould at the root. |
| Regular cleaning protects value | Cleaning every 12 to 18 months preserves paint life and sustains property value. |
Understanding your exterior materials
Before you clean anything, you need to know what you’re cleaning. Using the wrong pressure or chemical on the wrong surface is where most homeowner mistakes begin, and where the real damage happens.
Common cladding types and their needs
| Material | Recommended method | Pressure range |
|---|---|---|
| Vinyl siding | Soft wash or low-pressure rinse | 1,300 to 1,600 PSI |
| Timber/wood siding | Soft wash with gentle brush | 1,200 to 1,500 PSI |
| Brick and mortar | Pressure wash with care | 1,500 to 2,000 PSI |
| Hardie Board (fibre cement) | Soft wash only | Under 500 PSI |
| Stucco/render | Soft wash, no direct pressure | Under 800 PSI |
Recommended PSI settings vary significantly by material, and the consequences of getting them wrong range from stripped paint to warped cladding. Hardie Board manufacturers, for example, explicitly warn against high-pressure washing because it chips the surface and can void your warranty.
Soft washing is the method of choice for most residential exteriors. It uses low pressure under 100 PSI combined with biodegradable surfactants that kill algae and mould at the root rather than simply moving spores around the surface. For hard materials like concrete paths or brick retaining walls, a higher-pressure wash is appropriate provided you use the correct nozzle.
Here are the tools and products you’ll need before you start:
- Pressure washer with adjustable PSI and interchangeable nozzle tips (40-degree tip for general rinsing)
- Garden hose with spray attachment for soft washing and pre-wetting
- Soft-bristle brush or long-handled scrubbing brush
- Biodegradable exterior cleaning solution or a mix of diluted sodium hypochlorite with a surfactant
- Safety goggles, rubber gloves, and non-slip footwear
- Plastic sheeting or drop sheets to protect plants and outdoor furniture
- Ladder rated for the job, with a stable footing
Pro Tip: Always test your cleaning solution on a small, inconspicuous section first. Some older painted surfaces, particularly on Victorian or Edwardian homes, can react unexpectedly to surfactant-based products.
Preparing your home for exterior cleaning
Preparation is the step most homeowners skip entirely, and it’s the one that determines whether the job goes smoothly or ends in damage. Spend 30 minutes here and you will save yourself hours of problems later.
Start with a thorough inspection. Walk around your home and look for:
- Cracked or loose cladding panels that water could penetrate
- Gaps around window frames, eaves, or flashings
- Paint that is already peeling or bubbling
- Any signs of existing rot or moisture damage
- Exposed electrical outlets, light fittings, or power points on exterior walls
Any damaged areas should be noted and protected before water is introduced. Loose cladding should be secured where possible. Cover all electrical fixtures with plastic wrap and masking tape, or switch off the relevant circuit breakers. Move outdoor furniture, pot plants, and garden ornaments away from the work area.
Timing matters more than most people realise. Work on overcast days or in shade rather than in direct sun. When cleaning solution sits on a surface in full sun, it dries before you can rinse it off, leaving residue that attracts dirt and causes streaking. Early morning on a mild, overcast day is ideal for most Melbourne conditions.
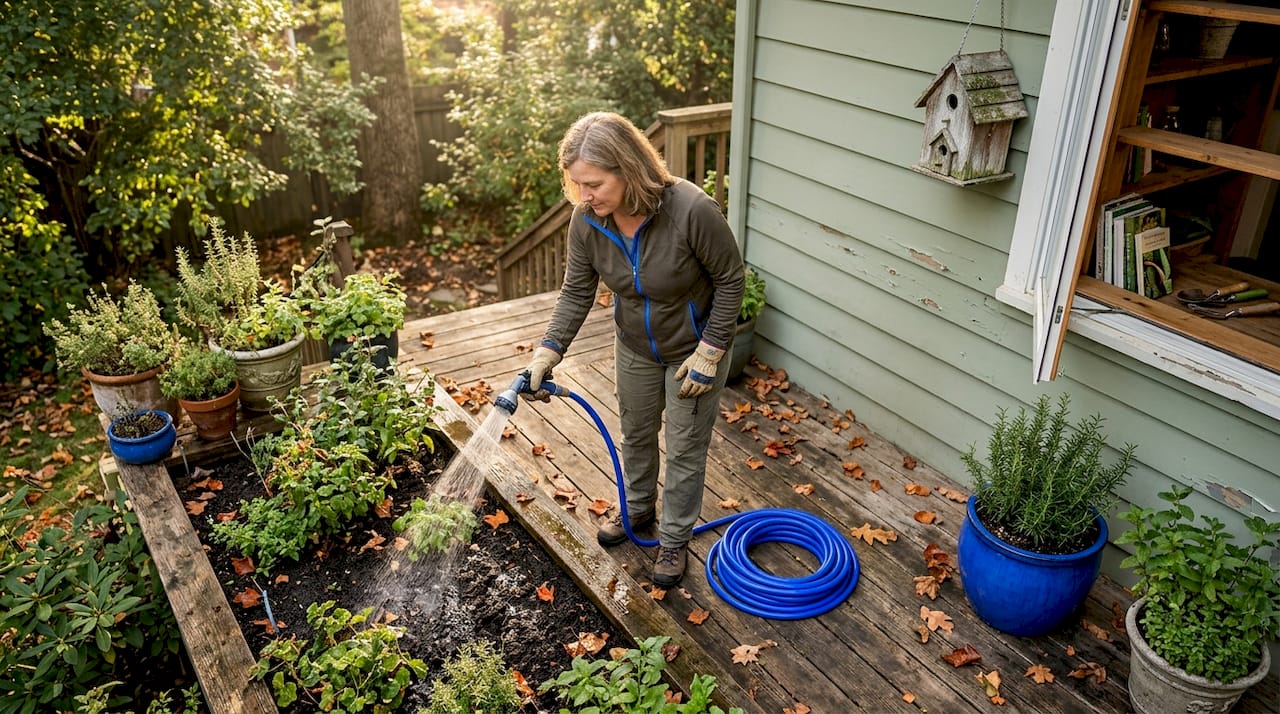
Pro Tip: Pre-wet your plants and garden beds with clean water before applying any cleaning solution to nearby walls. This dilutes any product that contacts the soil and dramatically reduces the risk of chemical damage to your garden.
The exterior cleaning process, step by step
This is the core of your exterior cleaning guide. Follow this sequence and you will get a clean, streak-free result without damaging your surfaces.
Step 1: Initial rinse to remove loose debris
Start by rinsing the entire surface with clean water using your garden hose or pressure washer on its lowest setting. This removes loose dirt, cobwebs, bird droppings, and surface dust before any chemical is applied. Work from the top of the wall downward. This step also pre-wets the surface, which helps the cleaning solution spread evenly and prevents it from absorbing too quickly into porous materials like brick.
Step 2: Apply cleaning solution from the bottom up
Apply your chosen cleaning solution starting from the ground and working upward. This is counter-intuitive, but it prevents streaking. When you apply product from the top down on a dry surface, the solution runs down and creates tide marks. Applying detergent bottom-up and rinsing top-down carries dirty water away cleanly and avoids those stubborn vertical streaks.
Work in manageable sections of roughly two to three metres at a time. Allow the solution to dwell for five to ten minutes while still wet. Do not let it dry.
Step 3: Soft wash or scrub the surface
For timber, Hardie Board, stucco, and vinyl, use a soft-bristle brush to work the solution gently into the surface. This loosens biofilm, mould, and embedded grime without scratching the material. For brick and concrete, a slightly firmer brush is appropriate.
High pressure damages delicate surfaces including painted timber, stucco, and vinyl by causing erosion, paint peeling, and long-term structural issues. If in doubt, use less pressure and more dwell time with your cleaning solution.
Step 4: Rinse from the top down
Once the solution has done its work, rinse the section from the top downward using a consistent, downward spray angle. Never spray at a 90-degree angle directly into the wall. Spraying perpendicular to siding forces water behind panels and can cause hidden rot that won’t become visible until serious structural damage has occurred.
A 40-degree nozzle tip at a downward angle is the safest general-purpose choice for rinsing most surfaces.
Step 5: Tackle stubborn stains
For staining that doesn’t lift with a general clean, apply a second pass of concentrated solution directly to the stain. Allow it to dwell longer, up to 15 minutes, and then use a brush to agitate the area before rinsing. For rust staining on brick or render, a purpose-formulated rust remover is more effective than repeated detergent applications.
Pro Tip: On heritage homes with original limewash or heritage render, avoid any acid-based stain remover entirely. These products can dissolve render and damage the substrate beneath. A specialist restoration team should assess stubborn staining on these surfaces before any chemical treatment is attempted.
Step 6: Final inspection and touch-ups
Walk the entire perimeter once more after drying and look for any missed patches, residue, or areas that need a second pass. Check around window sills, under eaves, and at the base of walls where debris tends to collect. This final review takes 10 minutes and ensures the whole job is finished to a consistent standard.
Common mistakes to avoid
Even experienced homeowners repeat these errors. Knowing them in advance puts you ahead.
- Using too much pressure. More pressure does not mean better cleaning. Improper technique damages surfaces permanently. The goal is to remove dirt while preserving the material beneath it.
- Using the 0-degree nozzle tip. This tip concentrates water into a single cutting point and can etch concrete, strip paint, and gouge timber. Avoid it entirely for residential surfaces.
- Letting solution dry on the surface. Working in direct sun or too large a section at once causes the product to dry and leave residue.
- Ignoring water intrusion risk. Moderate pressure can force water behind siding and into wall cavities, causing rot that isn’t visible until major damage has occurred.
- Skipping safety gear. Power washers generate between 1,800 and 4,400 PSI. At that pressure, an accidental spray to exposed skin causes serious lacerations. Goggles and gloves are not optional.
If you discover signs of rot, cracked render, damaged weatherboards, or peeling paint during your exterior clean, stop and get a professional assessment before proceeding. Cleaning over compromised surfaces pushes water into areas that are already vulnerable, accelerating damage rather than preventing it.
Knowing when to call a professional is part of good maintenance practice, not an admission of defeat. For homes with delicate heritage materials, unusual cladding profiles, or multi-storey elevations, professional cleaning is the lower-risk option.
Maintaining results over time
A single thorough clean is worthwhile. A consistent maintenance schedule is what actually preserves your home’s value and appearance.
Exterior siding should be cleaned every 12 to 18 months to prevent grime, mould, and biological growth from establishing themselves. Homes in shaded areas or near the coast need more frequent attention, as moisture and salt air accelerate biofilm growth.
Between major cleans, these simple habits extend your results significantly:
- Rinse eaves and fascias with a garden hose after heavy storms to clear debris and prevent moisture pooling
- Trim back trees and shrubs growing against the façade to reduce moisture retention and organic staining
- Check gutters and downpipes seasonally, as blocked drainage is one of the most common causes of wall staining
- Look for any new paint bubbling, rust staining, or caulking failure around windows and address it promptly
- Inspect the base of walls and at ground level after prolonged wet weather for signs of rising damp or soil splash
Regular cleaning also directly extends the life of your exterior paint. Grime, algae, and moisture sitting against a painted surface accelerate chalking and peeling. A clean façade holds a paint finish longer, which is one of the most cost-effective property value improvements you can make without a full repaint.
My take on cleaning versus damage
I’ve worked around Melbourne homes long enough to see the consequences of well-intentioned but poorly executed exterior cleaning. The most common scenario isn’t neglect. It’s a homeowner who hires someone with a pressure washer and no real understanding of what’s behind the cladding.
What I’ve come to believe firmly is this: chemistry does the work, not force. A quality biodegradable surfactant applied with patience and the right dwell time will outperform a high-pressure blast every time, and it won’t leave you with cracked render or delaminated paint in the process.
The misconception I encounter most often is that visible grime means you need more pressure. It doesn’t. It usually means you need a better-formulated product and more dwell time. I’ve also seen homeowners dismiss the exterior painting mistakes that follow a poorly executed clean. When water gets behind cladding, the paint above it will fail, often within a single season.
My honest advice: treat exterior cleaning as the first phase of maintenance, not the full solution. It sets the surface up for whatever comes next, whether that’s a fresh coat of paint or simply another year of protection. Do it properly, do it regularly, and your home will show it.
— Jarrad
Ready to take the next step after cleaning?
A thoroughly cleaned façade reveals what your home’s exterior actually looks like beneath the grime. For many Melbourne homeowners, that’s the moment they decide it’s time for a fresh coat of paint or more considered restoration work.

Sol Shine specialises in exterior painting services for Melbourne homes across Kew, Hawthorn, Camberwell, Brighton, Malvern, and surrounding suburbs. From refreshing a painted weatherboard to full heritage restoration of a Victorian or Edwardian façade, the team brings the same care and precision to every project that this guide asks of every cleaning job. If your home is due for more than a clean, or if you’ve uncovered damage during the process, reach out to Sol Shine for a consultation.
FAQ
How often should I clean my home’s exterior?
Clean exterior siding every 12 to 18 months as a general rule. Homes in coastal, shaded, or high-humidity areas may need cleaning annually to prevent mould and algae buildup.
What is the difference between soft washing and pressure washing?
Soft washing uses low pressure under 100 PSI with biodegradable surfactants to kill mould and algae at the root. Pressure washing uses higher PSI suited to hard surfaces like concrete and brick but can damage delicate materials like timber and render.
Why do I apply cleaning solution from the bottom up?
Applying solution bottom-up prevents streaking by stopping dirty runoff from travelling over areas you haven’t yet treated. You then rinse from the top down to carry all residue away cleanly.
Can I use a pressure washer on Hardie Board cladding?
No. Hardie Board manufacturers warn against high-pressure washing as it can chip the surface and void your warranty. Soft washing with specialised solutions under 500 PSI is the recommended approach.
When should I call a professional instead of cleaning myself?
Call a professional if you find signs of rot, cracked render, or damaged cladding during your inspection, or if your home is multi-storey or has heritage materials. Water intrusion from improper technique can cause structural damage that far outweighs the cost of professional cleaning.


