TL;DR:
- Many DIY paint jobs fail prematurely because homeowners often neglect primer, which is crucial for durability. Primer creates a strong chemical bond, seals porous surfaces, and blocks stains, reducing the need for extra coats and long-term repairs. Proper surface preparation and selecting the right primer type ensure a lasting, professional-quality finish that resists peeling and staining over time.
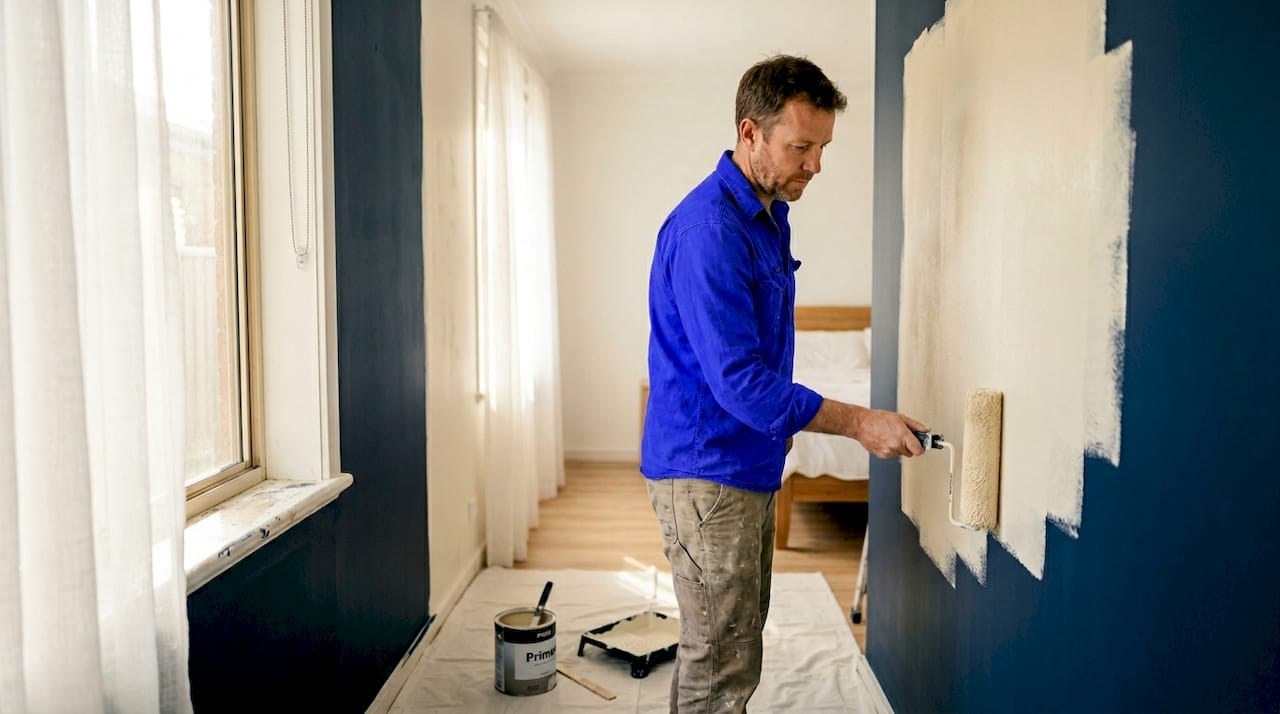
Most homeowners treat primer as optional. Buy paint, roll it on, done. But that shortcut is exactly why so many DIY paint jobs start peeling within a year, show bleed-through stains, or need three coats to cover a colour change that should have taken two. Understanding the role of primer in painting is the difference between a finish that lasts a decade and one that needs redoing by next summer. This article covers what primer actually does, which surfaces need it, how to choose the right type, and how to apply it properly.
Table of Contents
- Key takeaways
- The role of primer in painting: what it actually does
- When primer is necessary and when it is not
- Choosing the right primer for your project
- Best practices for applying primer
- How primer affects long-term paint durability
- What I have learned about primer after years on the tools
- Professional primer application from Sol Shine
- FAQ
Key takeaways
| Point | Details |
|---|---|
| Primer is not undercoat paint | Primer contains more resins than paint, creating a chemical bond that standard paint cannot replicate. |
| Surface type determines primer choice | Porous, glossy, and stained surfaces each require a specific primer formula for reliable adhesion. |
| Tinted primers save money | Matching primer colour to your topcoat reduces the number of finish coats needed, cutting material costs. |
| Recoat timing is critical | Applying topcoat too early or too late after priming causes adhesion failure, regardless of paint quality. |
| Skipping primer costs more long-term | Paint failures traced back to missing primer mean additional labour, product, and time to fix correctly. |
The role of primer in painting: what it actually does
Primer is not a thin coat of cheap paint. It is an adhesive undercoat with more resins than paint, which means it forms a stronger chemical bond with the surface beneath it. Think of it as the glue layer. Paint sits on top of primer far more reliably than it ever would on bare timber, bare plaster, or a previously painted wall in poor condition.
The role of paint primers comes down to three core functions.
- Adhesion promotion. Primer grips surfaces that paint would otherwise slide off or fail to bond with fully. This is especially relevant on slick or glossy surfaces.
- Surface sealing. On porous materials like bare timber, brick, or new drywall, primer fills the surface and prevents the topcoat from soaking in unevenly.
- Stain blocking. Primer’s stain inhibitors prevent blotches and odours from migrating through the topcoat, particularly in kitchens, bathrooms, and smoke-affected rooms.
One practical benefit that surprises many DIYers: primer creates a uniform surface that allows true, even colour from the topcoat. Without it, you often need an extra coat of finish paint just to achieve consistent coverage. That extra coat of premium paint costs considerably more than a litre of primer.
Pro Tip: If you are repainting a wall in a similar colour and the existing surface is clean and well-adhered, you may be able to skip primer. But if there is any doubt about surface condition, priming first is always the lower-risk choice.
When primer is necessary and when it is not
The importance of primer varies depending on what you are painting over and what you want the finished result to look like. Some situations make primer non-negotiable. Others allow you to skip it without consequence.
Surfaces that almost always need primer include:
- Bare timber and weatherboards. Untreated wood is highly porous and will drink up topcoat paint unevenly, leaving a patchy, dull finish with poor adhesion.
- New plasterboard and render. These surfaces absorb moisture rapidly and need primer to stabilise the surface before paint is applied.
- Bare brick and masonry. Similarly porous to timber, brick needs a sealing primer to prevent paint from flaking as the surface breathes.
- Glossy and previously painted slick surfaces. Tiles are a prime example. Sanding to remove the shine followed by a high-adhesion bond primer is the only reliable way to get paint to stick without early peeling.
- Stain-affected areas. Water damage, smoke staining, and tannin bleed from timber all require a dedicated stain-blocking primer before topcoat application.
Drastic colour changes are another clear case for primer. If you are going from a deep charcoal to a pale white, the topcoat will struggle to cover without multiple coats. A tinted primer reduces finish coats needed and significantly reduces overall product cost.
Where you can reasonably skip primer: repainting a wall in a similar colour where the existing paint is in good condition, fully adhered, and free from stains or damage. Even then, a light scuff sand and a clean surface are still required.
Choosing the right primer for your project
Not all primers are interchangeable. The formula matters, and using the wrong primer on a surface creates exactly the problems you were trying to avoid.
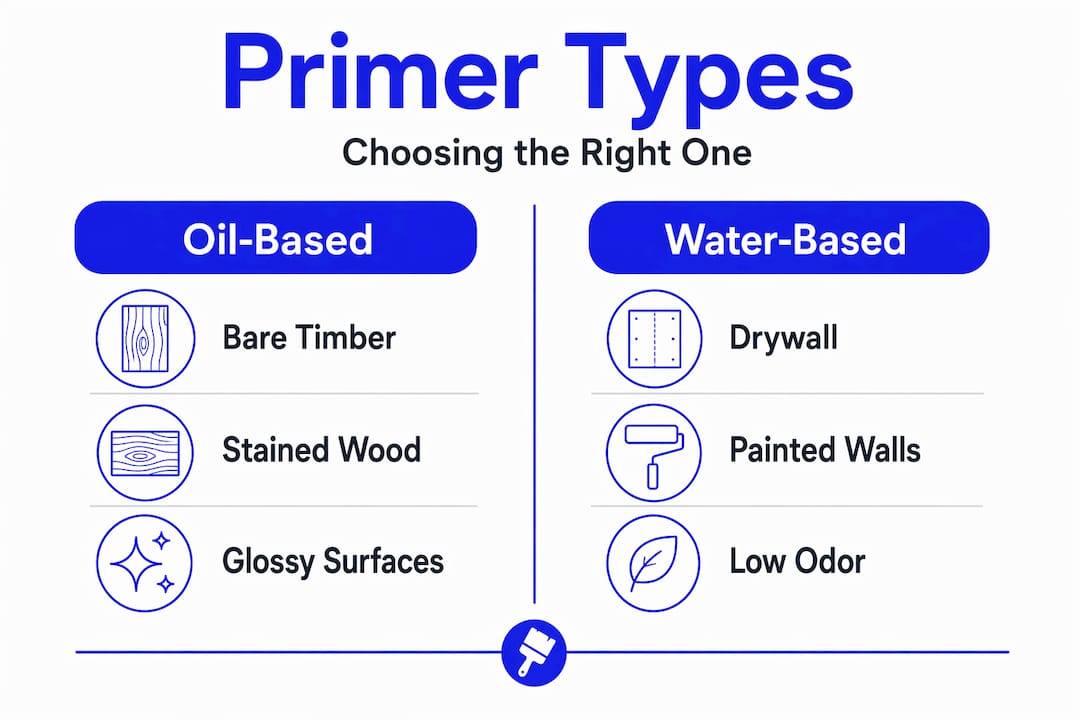
| Primer type | Best used for | Key consideration |
|---|---|---|
| Oil-based primer | Bare timber, stained surfaces, tricky adhesion | Longer dry time, stronger stain block, compatible with oil or latex topcoats |
| Latex (water-based) primer | General interior and exterior use on clean surfaces | Fast drying, low odour, easy clean-up |
| Shellac-based primer | Tough stains: smoke, water damage, odour | Softens at high temperatures, best for spot-priming rather than whole rooms |
| Tinted primer | Drastic colour changes | Cheaper than finish paint and reduces topcoat coats needed |
For most interior repaints in Melbourne homes, a quality water-based primer is sufficient. Where you are dealing with heritage timber trim, tannin-rich hardwoods, or significant staining, oil-based primers deliver better results despite the longer drying window.
Compatibility matters too. If you are applying a water-based topcoat, a water-based primer is generally the safest pairing. Oil-based topcoats work over both oil and water-based primers in most cases, but always check the product specifications before committing.
Pro Tip: When tackling a significant colour change, ask your paint supplier to tint your primer to approximately 70% of your topcoat colour. This single step can eliminate the need for a third finish coat and represents a genuine cost saving on large projects.
Best practices for applying primer
Even the best primer delivers poor results if applied incorrectly. Surface preparation is where most primer failures begin, not the product itself.
Follow these steps for reliable primer application:
- Clean the surface thoroughly. Grease, dust, and contaminants prevent primer from bonding. Sugar soap and water is effective for most interior surfaces. Allow to dry completely before priming.
- Sand as required. Bare timber should be sanded smooth and edges feathered. Glossy surfaces need sanding to dull the sheen before a bond primer will grip effectively.
- Remove all dust. After sanding, wipe down with a damp cloth or tack cloth. Dust trapped under primer creates a gritty texture that telegraphs through the topcoat.
- Apply an even coat. Avoid applying primer too thickly. A thin, even coat promotes proper adhesion and faster drying. Two thin coats are always better than one heavy coat that takes too long to cure.
- Respect the recoat window. Primer recoat timing varies by product and environment, but most water-based primers are touch-dry within 90 minutes and recoatable from that point. Do not apply topcoat too early or adhesion suffers. Do not leave primed surfaces exposed too long either, as dust contamination becomes an issue.
- Apply a second coat on problem surfaces. One primer coat is often sufficient, but heavily stained or highly porous surfaces benefit from a second coat before painting.
For proper guidance on surface preparation before painting, understanding the steps before the primer goes on is just as important as the priming itself.
Pro Tip: Mismatched primer chemistry or ignoring the recoat timing window is responsible for most repaint failures. When a paint job looks poor after two weeks, the primer stage is usually where the process went wrong, not the topcoat paint.
How primer affects long-term paint durability
The primer benefits in painting are not always visible immediately. This is the part most DIYers miss. You apply primer, it looks adequate, and then you paint over it. The real performance of a well-primed surface only becomes clear months or years later when the paint still looks crisp and the adhesion holds firm.
Using primer for durability comes down to several compounding effects:
- Prevention of peeling and blistering. Paint that bonds to a properly sealed, primed surface has no reason to lift. Paint applied directly to porous or contaminated surfaces creates weak adhesion points that eventually fail.
- Stain and odour containment. Even after the topcoat cures, stains from smoke, moisture, or tannin can bleed through if primer was not used. This migration often appears weeks after painting, not immediately.
- Colour uniformity over time. A well-primed surface holds paint colour more consistently as it ages, reducing the patchy or chalky appearance that develops on poorly prepared walls.
- Fewer repaints needed overall. Professional workflows treat primer as integral to the coating system, not optional. Skipping it almost always means an earlier return to the same walls with more product and more labour.
“The adhesion and stain-blocking qualities of primer often only become apparent after the finish coat cures, illustrating primer’s integral role in the painting system.”
For advice on maintaining paint performance over the long term, Sol Shine’s paint maintenance guidance offers practical insight specific to Melbourne conditions.
What I have learned about primer after years on the tools
I have walked through hundreds of homes in Melbourne’s inner east and bayside suburbs where the same story plays out. A homeowner did a DIY repaint two or three years prior. The colour looks fine. But in the bathroom, or on the heritage timber architraves, or along the weatherboards, the paint is lifting or staining through. And almost every time, the answer is the same: no primer, or the wrong primer, applied without adequate surface prep.
What I have come to understand is that most people focus on initial coverage when they prime. The surface looks white and even, so they move on. What they do not account for is that the adhesion and stain-blocking effects only fully manifest after the finish coat cures and the surface goes through temperature and humidity cycles. By then, the decision to skip primer or rush the recoat window is locked in.
My honest view is that primer is where the real investment of a quality paint job happens. It costs less per litre than finish paint, takes less time to apply, and yet it is the stage most likely to be cut short. The time pressure of a weekend DIY project is real. But spending an extra two hours on proper priming will save you from redoing the whole job in 18 months. I have seen it too many times to argue otherwise.
Approach priming as the foundation, not the formality. Get the interior painting workflow right from the start, and the topcoat will do exactly what it is supposed to do.
— Jarrad
Professional primer application from Sol Shine

Sol Shine’s painting process begins well before the first coat of colour goes on. Proper priming is built into every interior and exterior painting project the team undertakes, from preparation and surface repair through to the final topcoat. For homeowners in Kew, Hawthorn, Brighton, Camberwell, and surrounding Melbourne suburbs, that means paint jobs that hold up year after year rather than requiring remedial work down the track. Whether you are dealing with heritage timber, bare render, or a significant colour change, Sol Shine selects the right primer for each surface and applies it correctly the first time. Explore Sol Shine’s interior painting services or exterior painting portfolio to see the quality that proper preparation delivers. Contact Sol Shine for a consultation.
FAQ
What does primer do that paint cannot?
Primer contains a higher resin content than standard paint, which allows it to bond chemically with surfaces and seal porosity. Paint alone does not create the same adhesive foundation and will fail on bare or contaminated surfaces without it.
Can you skip primer when repainting interior walls?
You can skip primer when repainting in a similar colour over a clean, well-adhered, non-porous surface in good condition. On bare surfaces, stained areas, or drastic colour changes, primer is necessary for a quality result.
How long should primer dry before painting?
Most water-based primers are touch-dry within 90 minutes and ready to recoat from that point, though conditions affect timing. Always follow the specific product’s recoat guidelines, as applying topcoat too early compromises adhesion regardless of primer quality.
Which primer is best for bare timber?
Oil-based primers perform best on bare timber, particularly tannin-rich hardwoods, because they penetrate deeply and block stain bleed-through effectively. Water-based primers can be used on soft timber in good condition, but oil-based options offer stronger adhesion on heritage joinery and weatherboards.
Does using a tinted primer really make a difference?
Yes. A tinted primer matched to approximately 70% of your topcoat colour reduces the number of finish coats needed on drastic colour changes and costs considerably less per litre than premium finish paint. On large projects, this represents a meaningful saving in both time and materials.


