Replacing laserlight windows in your Victorian or Edwardian Melbourne home requires careful planning and specialist knowledge to preserve heritage value whilst meeting modern standards. These distinctive glass features define period properties across Kew, Hawthorn, Brighton and surrounding suburbs, yet many homeowners struggle to find reliable guidance on proper replacement techniques. Whether you’re undertaking a comprehensive restoration or addressing damaged panels, understanding the preparation, execution and verification stages ensures your project respects both aesthetic integrity and heritage compliance whilst delivering lasting results.
Table of Contents
- Understanding Laserlight And Its Heritage Significance
- Preparing For Laserlight Replacement In Heritage Projects
- Step-By-Step Process To Replace Laserlight Safely And Effectively
- Verifying Quality And Maintenance After Laserlight Replacement
- Trusted Heritage Window Restoration Services In Melbourne
- How To Replace Laserlight FAQ
Key takeaways
| Point | Details |
|---|---|
| Heritage compliance | Proper laserlight replacement protects property value and satisfies Melbourne heritage regulations |
| Specialist engagement | Victorian and Edwardian restorations demand tradespeople experienced in period-specific techniques |
| Laser cleaning advantage | Non-destructive preparation removes hazardous materials without damaging delicate substrates |
| Staged approach | Systematic preparation, execution and verification stages ensure quality outcomes |
| Long-term preservation | Post-installation maintenance extends window lifespan and maintains heritage character |
Understanding laserlight and its heritage significance
The term laserlight commonly refers to leadlight stained glass windows featuring coloured or textured glass panels held together by lead cames, a signature element in Victorian and Edwardian architecture throughout Melbourne’s inner suburbs. These windows served both functional and decorative purposes, filtering natural light whilst adding visual interest to entry halls, stairwells and front rooms. Original craftsmen used techniques including copper foiling, lead came assembly and acid etching to create intricate patterns ranging from geometric designs to floral motifs.
Preserving these features matters because they contribute significantly to a property’s heritage character and market value. Melbourne’s heritage overlay areas enforce strict guidelines around alterations to period homes, making unauthorised changes potentially costly. Beyond regulations, laserlight windows represent irreplaceable craftsmanship that modern manufacturing rarely replicates with the same attention to detail and material quality.
Common construction elements in original laserlight include:
- Lead cames in H-shaped profiles joining individual glass pieces
- Hand-blown or rolled cathedral glass with natural variations
- Solder joints at intersections requiring precise temperature control
- Putty or cement compound sealing gaps between glass and came
- Timber frames with traditional joinery methods and period-appropriate profiles
Homeowners must treat these windows as delicate architectural elements requiring specialist handling. The lead content poses health risks during removal, whilst the glass itself often becomes brittle after decades of thermal cycling and UV exposure. Understanding these vulnerabilities helps you approach replacement with appropriate caution and respect for the original craftsmanship. Our heritage window repair guide provides additional context for assessing condition and planning interventions.
Preparing for laserlight replacement in heritage projects
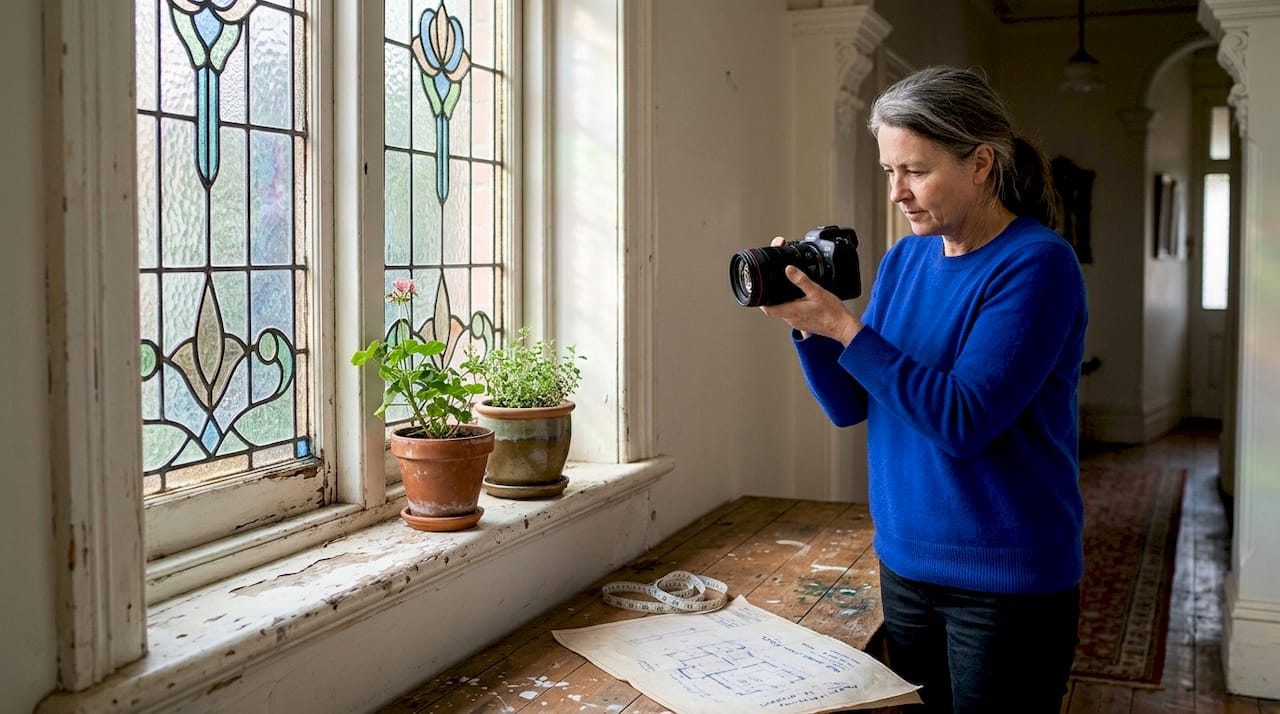
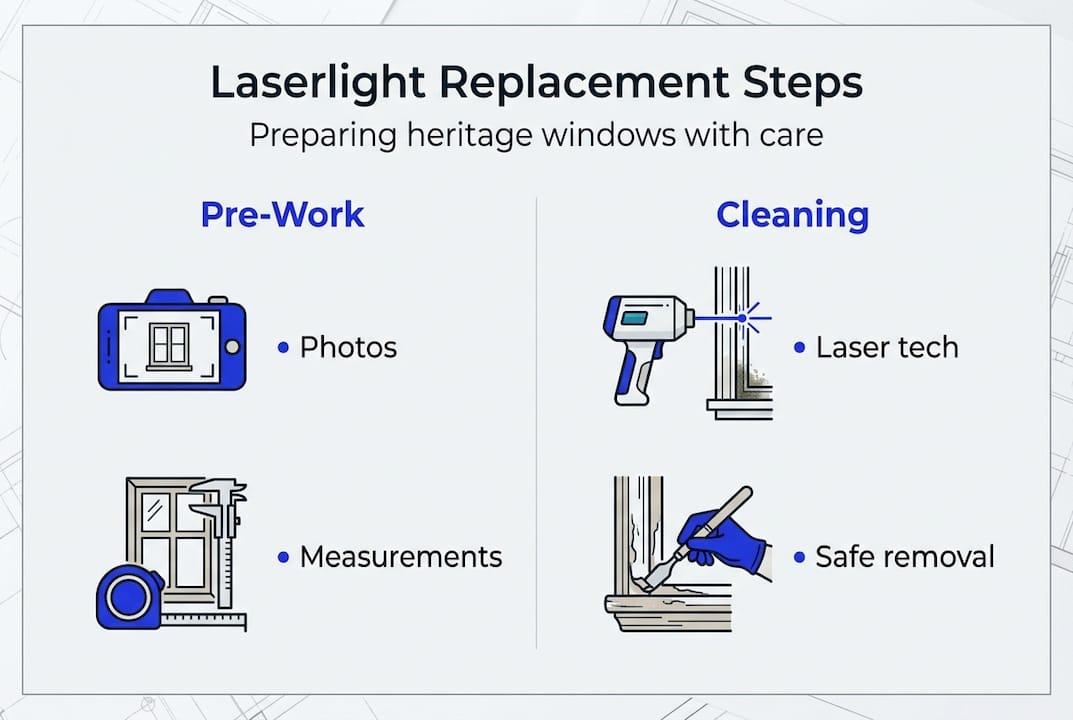
Successful laserlight replacement begins with thorough documentation and assessment. Photograph each window from multiple angles, noting existing damage, previous repairs and unique design elements. Measure dimensions precisely, recording both overall frame sizes and individual panel configurations. This documentation serves multiple purposes: guiding accurate reproduction, satisfying heritage permit requirements and providing a baseline for quality verification after installation.
Melbourne’s heritage regulations vary by suburb and overlay designation, with areas like Kew, Hawthorn and Brighton often requiring council approval for external alterations. Contact your local council’s heritage advisor early in the planning process to understand specific requirements for your property. Some councils mandate using salvaged materials or employing certified heritage tradespeople, whilst others accept faithful reproductions provided they match original specifications.
Material selection directly impacts both authenticity and longevity. Consider these factors when sourcing replacement components:
- Glass type matching original texture, colour and thickness specifications
- Lead came profiles replicating period-appropriate dimensions and patina
- Solder composition balancing workability with heritage authenticity
- Putty formulations providing flexibility without modern synthetic additives
- Timber species and profiles matching existing frames for seamless integration
Laser cleaning technology offers significant advantages during substrate preparation, particularly when dealing with lead-based paints common in heritage properties. This method removes contaminants without chemical solvents or abrasive techniques that risk damaging delicate timber profiles or masonry surrounds. Following heritage painting safety standards ensures both worker protection and environmental compliance throughout the preparation phase.
| Preparation aspect | Requirement | Timeline |
|---|---|---|
| Documentation | Photos, measurements, condition notes | 1-2 days |
| Heritage permits | Council submission and approval | 4-8 weeks |
| Material sourcing | Glass, lead, solder, timber | 2-4 weeks |
| Specialist engagement | Quotes, scheduling, contracts | 1-2 weeks |
Engage Melbourne specialists experienced in Victorian and Edwardian styles who understand period construction methods and can navigate heritage compliance requirements. Request references from similar projects and verify their familiarity with laser cleaning techniques and traditional leadlight assembly. Quality tradespeople will conduct site visits, provide detailed quotes and discuss preservation priorities before commencing work.
Pro Tip: Schedule laserlight replacement during Melbourne’s drier months between November and March to minimise weather-related delays and ensure optimal curing conditions for putty, paint and heritage restoration coatings.
Step-by-step process to replace laserlight safely and effectively
Executing laserlight replacement requires methodical attention to detail and adherence to heritage preservation principles. Follow these stages to achieve professional results:
-
Safe removal of existing windows: Establish drop sheets and containment barriers to capture lead dust and glass fragments. Carefully remove timber beading or putty securing panels within frames, working from top to bottom to prevent sudden releases. Support each panel as fixings release, transferring immediately to padded storage. Label every component with location references for accurate reinstallation or pattern replication.
-
Substrate preparation using laser cleaning: Deploy laser cleaning for non-destructive preparation, particularly effective on lead-based paints and accumulated grime without damaging underlying timber or masonry. The laser ablates contaminants through controlled energy pulses, leaving surfaces clean and ready for new finishes. This approach eliminates chemical waste and reduces health risks compared to traditional methods.
-
Comparison of preparation methods: Understanding the advantages of laser technology versus conventional approaches helps justify the investment for large-scale heritage projects.
| Method | Advantages | Limitations |
|---|---|---|
| Laser cleaning | No chemicals, precise control, minimal substrate damage | Higher initial equipment cost, requires trained operators |
| Chemical stripping | Effective on thick paint layers, familiar to many contractors | Toxic waste disposal, potential timber damage, health hazards |
| Abrasive blasting | Fast coverage on robust surfaces | Aggressive action risks damaging delicate profiles and glass |
-
Installing replacement laserlight panels: Position new or restored panels within prepared frames, ensuring proper alignment and consistent reveal dimensions. Secure with traditional glazing techniques using linseed oil putty for external applications or modern equivalents approved for heritage work. Apply putty in continuous beads, tooling to shed water whilst maintaining period-appropriate profiles. Allow adequate curing time before painting, typically 7-14 days depending on temperature and humidity.
-
Final sealing and inspection: Paint timber components using heritage-appropriate colours and formulations, ensuring compatibility with existing finishes on surrounding elements. Inspect all solder joints, putty lines and frame connections for gaps or misalignments. Verify that panels sit plumb and square within openings, with consistent spacing around perimeters. Document completed work photographically for heritage records and future maintenance reference.
“Laser restoration provides a safe, efficient alternative to chemical strippers and abrasive methods, particularly valuable when addressing hazardous materials in occupied heritage buildings where containment and worker safety are paramount.”
Safety considerations throughout the process include:
- Respiratory protection rated for lead dust and paint particles
- Eye protection against laser radiation and glass fragments
- Proper ventilation and containment of work areas
- Disposal of lead-contaminated materials through licensed waste contractors
- First aid provisions and emergency procedures for cuts or chemical exposure
Pro Tip: Create full-size paper templates of intricate laserlight patterns before disassembly, providing accurate guides for glass cutting and came assembly that preserve original design proportions even when working from damaged or incomplete panels. Consult our heritage window repair guide for additional pattern documentation techniques.
Verifying quality and maintenance after laserlight replacement
Quality verification begins immediately upon installation completion and continues through initial settlement periods. Inspect each window systematically using this checklist:
- Lead came alignment showing consistent spacing and straight runs
- Solder joints appearing smooth and fully fused without cold spots or excess buildup
- Glass pieces fitting snugly within cames without rattling or excessive gaps
- Putty application forming weather-tight seals with proper tooling profiles
- Paint coverage providing uniform appearance without runs, sags or missed areas
- Frame operation allowing smooth opening and closing where applicable
- Weather seals performing effectively during rain events
Common installation errors include mismatched glass types creating visual inconsistencies, inadequate solder penetration leading to weak joints, and improper putty curing causing premature failure. Address these issues immediately whilst contractors remain on site, documenting corrections for warranty purposes. Homeowners should engage Melbourne specialists familiar with period construction to ensure installations meet both aesthetic and performance standards.
Ongoing maintenance extends laserlight window lifespan significantly. Clean glass surfaces using pH-neutral solutions and soft cloths, avoiding abrasive cleaners that scratch antique glass or damage lead patina. Inspect putty annually for cracking or separation, reapplying as needed before water infiltration damages timber frames. Monitor lead cames for sagging or bowing, particularly in large panels where gravity stresses joints over time.
Schedule professional inspections every 3-5 years to assess structural integrity and identify emerging issues before they require extensive repairs. Specialists can re-solder weakened joints, replace damaged glass pieces and refresh putty whilst maintaining heritage character. Keep detailed maintenance records including dates, work performed and materials used, supporting future restoration efforts and heritage compliance documentation.
When specialist intervention becomes necessary:
- Visible water staining around window perimeters indicating seal failure
- Rattling glass suggesting loose cames or deteriorated putty
- Bowing or sagging panels requiring structural reinforcement
- Paint failure exposing timber to moisture and UV damage
- Previous repairs showing signs of incompatibility or deterioration
Document all alterations and maintenance activities for heritage council records, particularly in overlay areas where modifications require approval. Maintain photographic evidence, contractor invoices and material specifications demonstrating compliance with approved works. This documentation protects property value and simplifies future permit applications.
Pro Tip: Apply UV-filtering window film to interior surfaces of south and west-facing laserlight panels, reducing colour fading and extending glass longevity without altering external appearance or compromising heritage authenticity. Consider professional advice from specialist heritage painters regarding protective treatments compatible with period architecture.
Trusted heritage window restoration services in Melbourne
Navigating laserlight replacement in your Victorian or Edwardian home demands expertise that balances heritage preservation with modern performance standards. Sol Shine specialises in comprehensive restoration projects across Melbourne’s inner east, bayside and surrounding suburbs, bringing decades of experience with period properties in Kew, Hawthorn, Brighton, Malvern and beyond. Our team handles everything from initial assessment through final verification, ensuring seamless integration of replacement windows with existing heritage features.

We deliver complete heritage painting services alongside window restoration, coordinating all trades under one roof to streamline your project timeline and maintain consistent quality standards. Whether you’re addressing isolated window damage or undertaking whole-property restoration, our craftspeople understand the techniques, materials and compliance requirements specific to Melbourne’s heritage architecture. From laser cleaning preparation through custom joinery and architectural woodwork, we provide the specialised skills your laserlight replacement deserves. Explore our heritage window repair guide or discuss your project requirements with our team to discover how professional restoration protects your investment whilst honouring your home’s historic character. Our interior painting services complement window work, delivering cohesive results throughout your heritage property.
How to replace laserlight FAQ
What is laserlight and how does it differ from leadlight?
Laserlight is a common misspelling of leadlight, referring to decorative windows featuring coloured or textured glass panels joined by lead cames. The terms describe the same heritage window style found throughout Victorian and Edwardian Melbourne homes, with no technical distinction between them.
Why is laser cleaning preferred for heritage window restoration?
Laser cleaning removes lead-based paints and contaminants without chemicals or abrasive techniques that risk damaging delicate timber profiles and masonry surrounds. This non-destructive method eliminates toxic waste disposal requirements whilst providing precise control over substrate preparation, making it ideal for occupied heritage properties where safety and preservation are priorities.
How do I find qualified laserlight specialists in Melbourne?
Seek tradespeople with demonstrated experience in Victorian and Edwardian restoration, requesting references from similar projects in heritage overlay areas. Verify their familiarity with traditional leadlight assembly techniques, laser cleaning technology and local council compliance requirements. Professional associations and heritage councils often maintain directories of certified practitioners.
What are typical costs and timelines for laserlight replacement?
Costs vary significantly based on window size, design complexity and heritage requirements, typically ranging from $2,000 to $8,000 per window for complete replacement including frames. Projects requiring heritage permits add 4-8 weeks to timelines, whilst material sourcing and specialist scheduling extend overall duration to 8-12 weeks from initial assessment to final installation.
How should I maintain restored laserlight windows?
Clean glass quarterly using pH-neutral solutions and soft cloths, avoiding abrasive cleaners that damage antique glass or lead patina. Inspect putty annually for cracking, reapplying before water infiltration occurs. Schedule professional assessments every 3-5 years to identify structural issues, re-solder weakened joints and refresh protective coatings, ensuring your investment delivers decades of heritage beauty.
Can I replace laserlight windows myself or do I need professionals?
Whilst skilled DIY enthusiasts can handle simple repairs, complete laserlight replacement demands specialist knowledge of lead safety, glass cutting, came assembly and heritage compliance. Professional installation ensures proper techniques, appropriate materials and regulatory adherence, protecting both your health and property value whilst delivering results that honour your home’s historic character.
Recommended
- Heritage window repair guide for Melbourne Victorian homes
- East Melbourne – Solshine
- Master heritage weatherboard replacement in Melbourne homes
- Premium paint vs standard: best for Melbourne heritage homes
- HVAC for Historic Buildings: 2025 Guide for Homeowners & Managers – HVAC Service and Repair | Louisville, KY | Project Heating & Cooling


